
Buying a ticket and your tickets wallet
How to buy a ticket to an event as a member or a guest, the three ways you might pay, your QR ticket, the My Tickets wallet, and what to do if you change your mind.
This guide covers the buyer's side of ticketing: getting a ticket, understanding how you'll pay, finding your QR code, and where to go if your plans change. If you're setting up ticket types to sell for your own event instead, see Selling tickets for your event.
Finding and buying a ticket
On the event page, look for the ticket or registration option. If the event offers more than one ticket type — General Admission and VIP, for example — you'll be able to compare them, including any benefits the organiser has listed for each, before picking one.
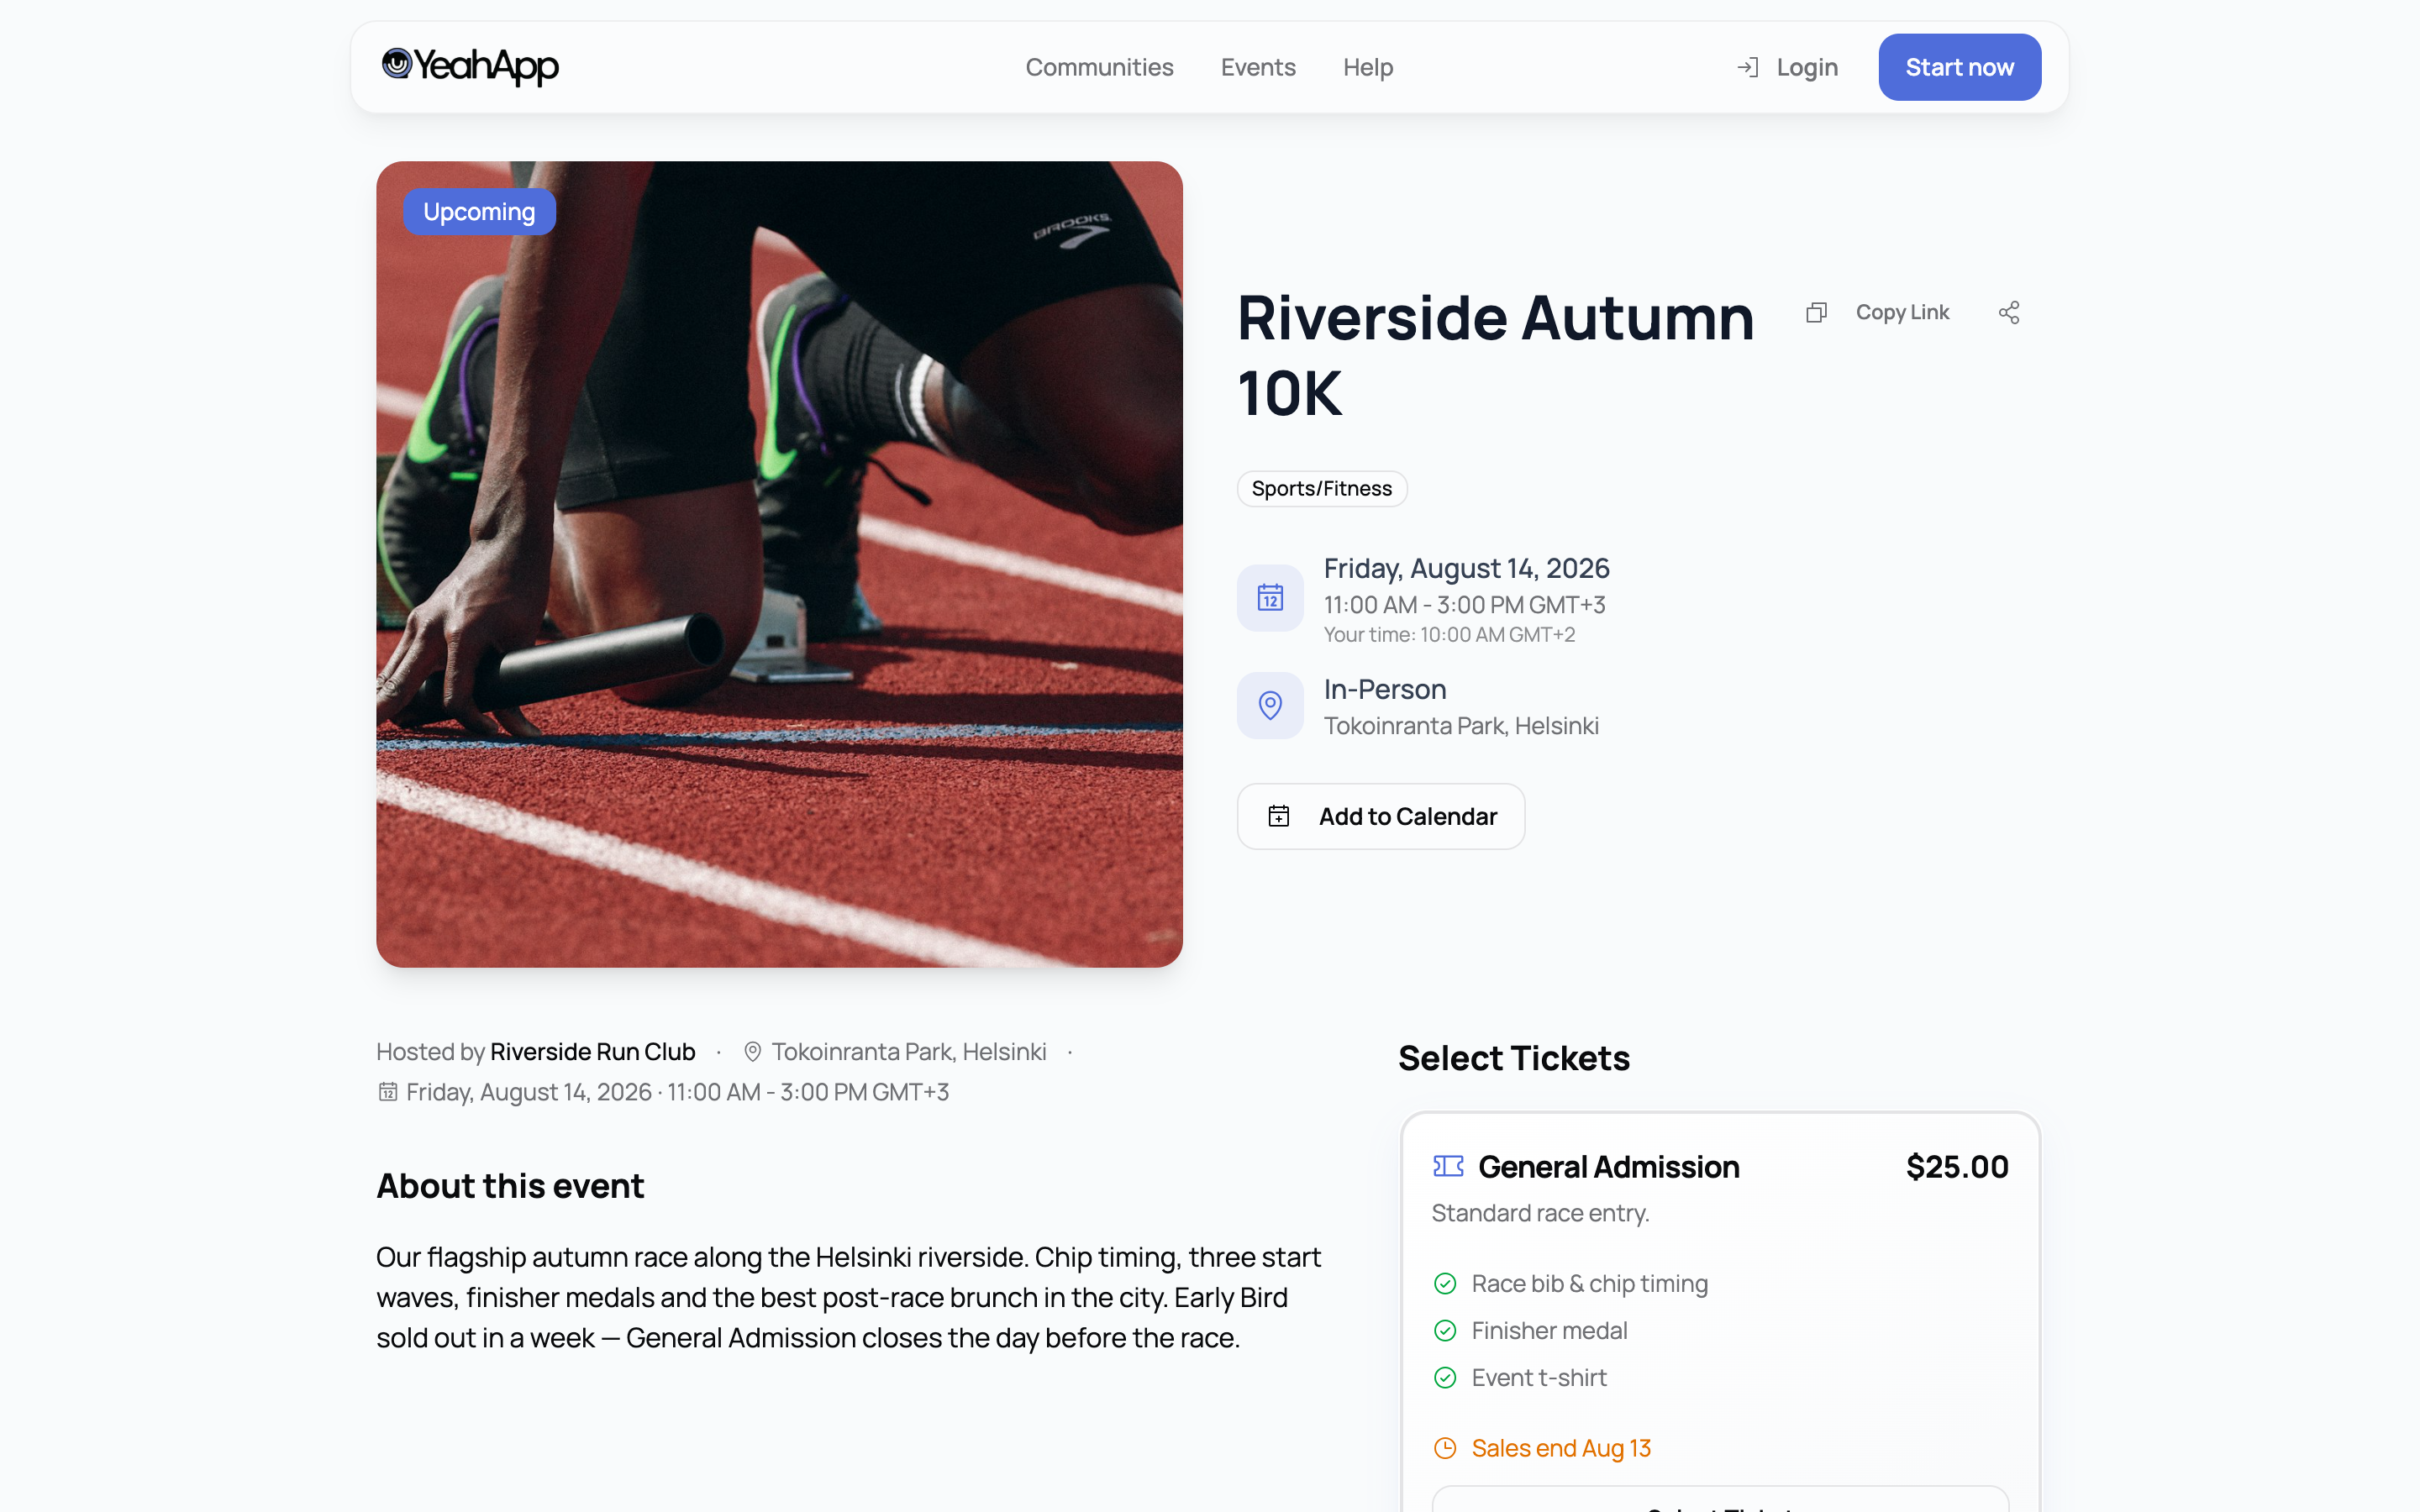
Each checkout gets you exactly one ticket. There's no way to buy several tickets in one go, and each email address can only hold one active ticket per event at a time. If you're getting tickets for a group, everyone needs to check out individually with their own name and email.
Heads up. If an event is gender-restricted, you may be asked to confirm your gender before you can complete checkout. This only appears when the organiser has set a restriction and it isn't already on file for your account.
Buying with an account vs. as a guest
You don't need a YeahApp account to get a ticket, unless the event is set to members-only — in that case you'll need to sign in first.
- Signed in. Your ticket is issued under the name and email already on your account. You can't change these at checkout — they're pulled from your account automatically.
- As a guest. Enter your name and email once at checkout. Behind the scenes this gives you a lightweight account so you can come back and view your ticket later, but it doesn't make you a member of the community — buying a ticket makes you an attendee, not a member.
Whichever way you buy, your name and email are locked to that ticket the moment checkout completes. There's no way to change them, or transfer the ticket to someone else, afterwards. If the wrong person ends up holding a ticket, the fix is to cancel or refund it and have the right person buy a fresh one.
How you pay: three ways to settle up
Which one you get depends on how the organiser set up the ticket type:
- Online, paid. You pay by card through Stripe Checkout. At checkout you'll see your ticket price and total, plus a separate processing fee line (2.9% + €0.30) — that's Stripe's own card-processing charge, passed straight through rather than kept by the organiser or YeahApp. Once payment goes through, your ticket is confirmed.
- Free. No payment step at all — your reservation is confirmed the moment you check out.
- Pay at the door. Also confirmed immediately, with nothing to pay online. You bring cash (or whatever the organiser accepts) and pay when you arrive. Your QR ticket works for check-in regardless of whether you've paid yet — that part is just for the organiser's own records.
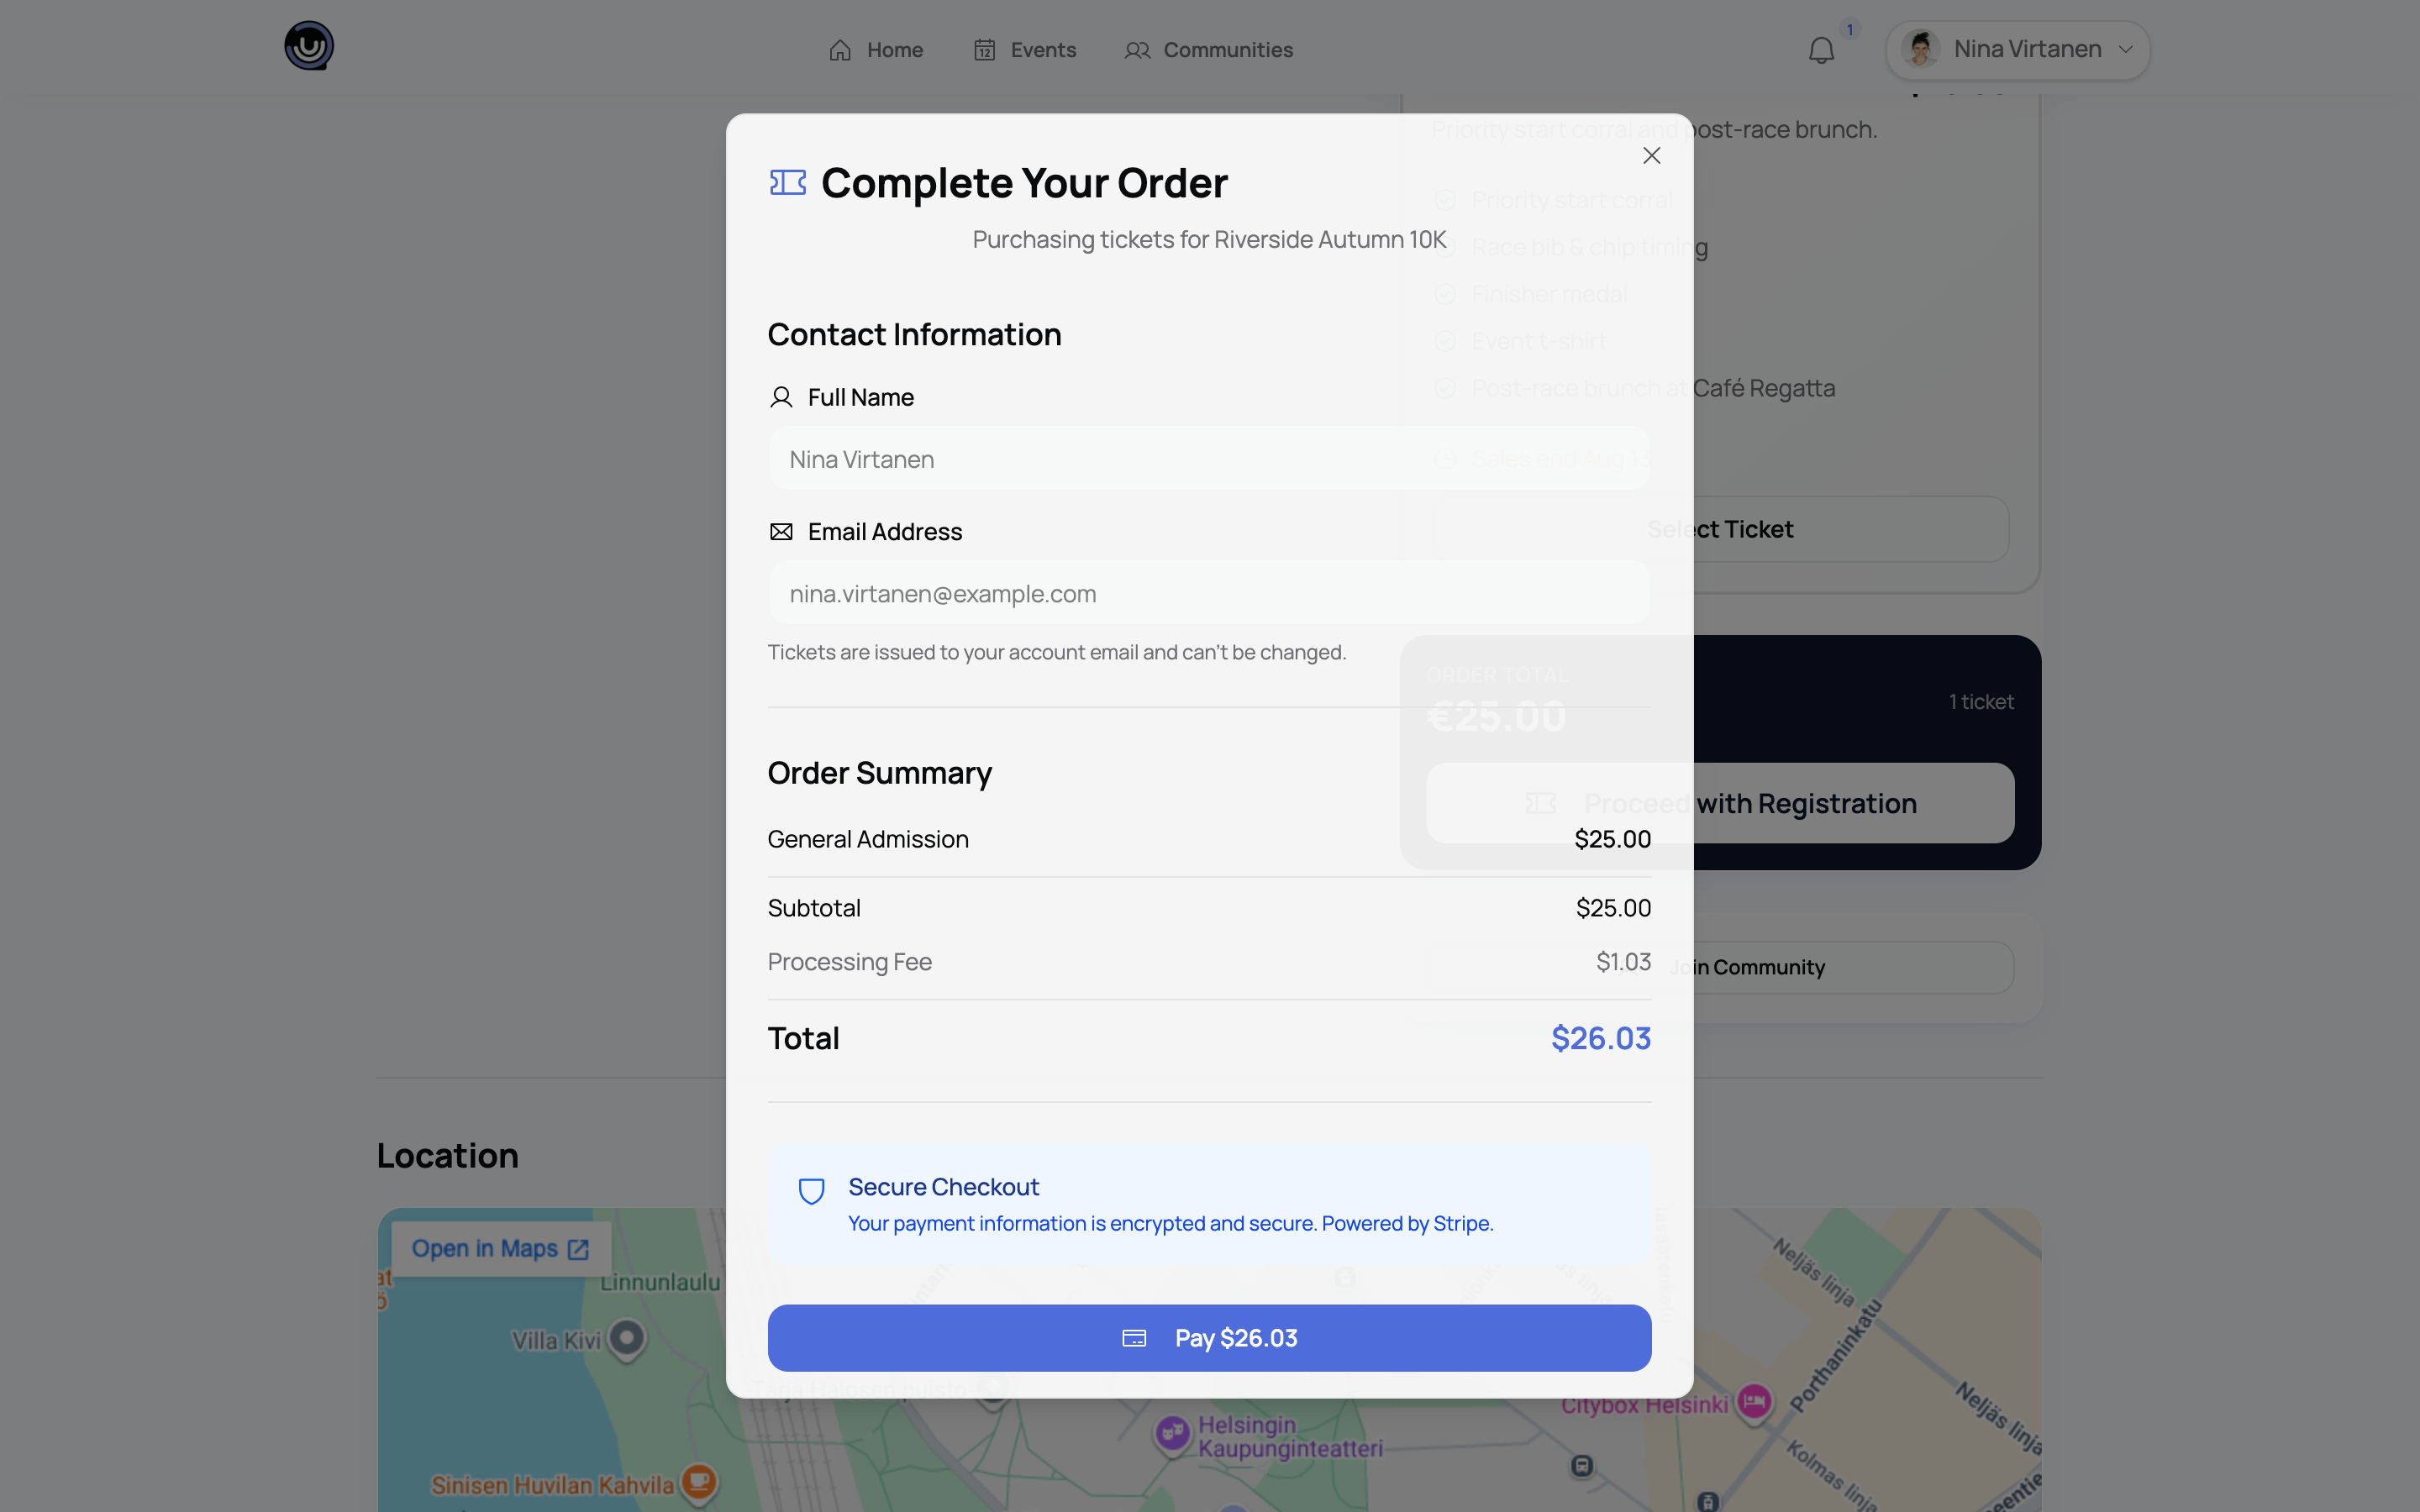
Heads up. If you start an online paid checkout but don't finish it, your spot is held for a short while so you can pick up where you left off. If you'd rather change your mind on which ticket type to buy, you can cancel it and start again.
After you buy: confirmation and your QR ticket
Once checkout completes, you'll land on a confirmation page that briefly shows "Processing…" before settling on "Order Confirmed!" — this covers the moment it takes for your payment to be confirmed behind the scenes. You'll also get a confirmation email with your ticket details.
Every ticket comes with a unique QR code, generated as soon as your registration goes through — free RSVPs get one too, not just paid tickets. This is what gets scanned at the door on the day; see Checking people in with QR codes for how that works. A couple of things worth knowing:
- Once your code has been scanned and you're checked in, it can't be used again — showing up twice with the same code won't get a second entry.
- Door staff check the QR code itself, not photo ID, so make sure the right person is holding the ticket when they arrive.
My Tickets: your wallet
If you have a YeahApp account, every ticket you buy shows up in your My Tickets wallet, split into Upcoming and Past. Each ticket links through to its own page with the QR code and the event details.
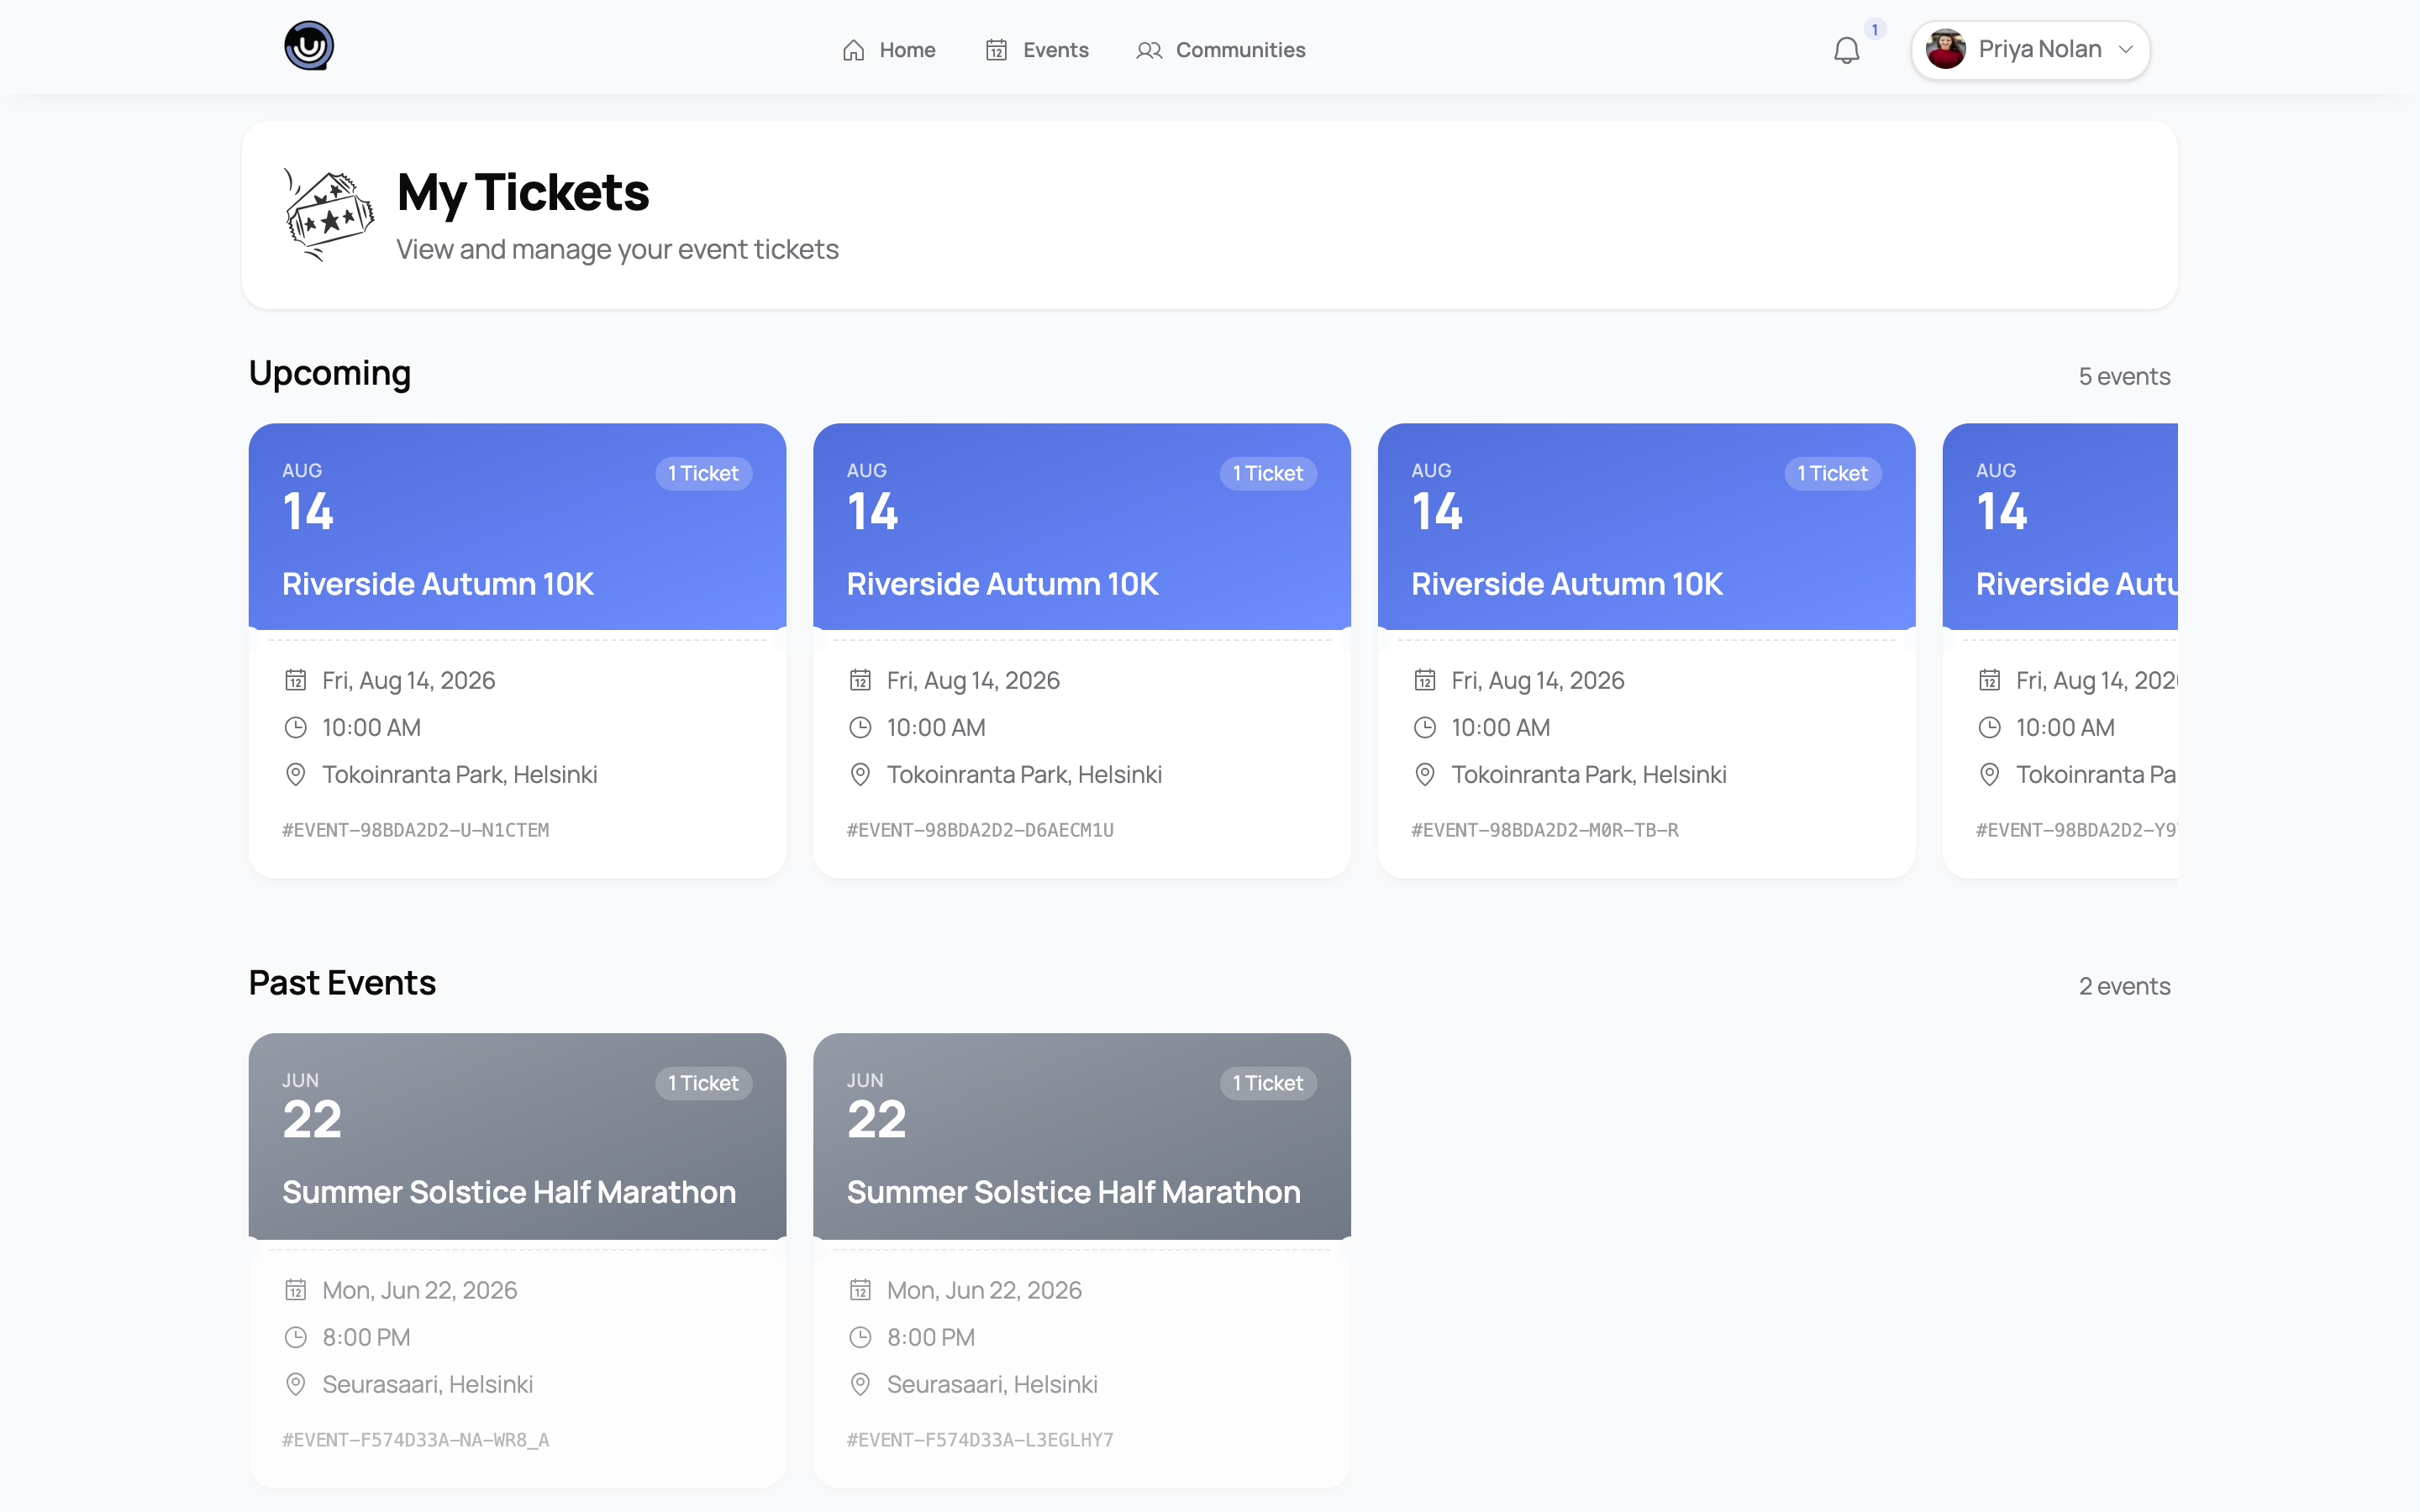
If you bought as a guest and don't have an account, you won't see a wallet — instead, use the link in your confirmation email any time you need your ticket. It takes you straight to the same ticket page.
Changing your mind: refunds and cancellations
If you bought an online paid ticket and want your money back, you can submit a refund request from the event page or your ticket. The organiser reviews it and decides whether to approve it — refunds aren't automatic. The full guide, including what happens at each step and how long it takes, is here: How event refunds work on YeahApp.
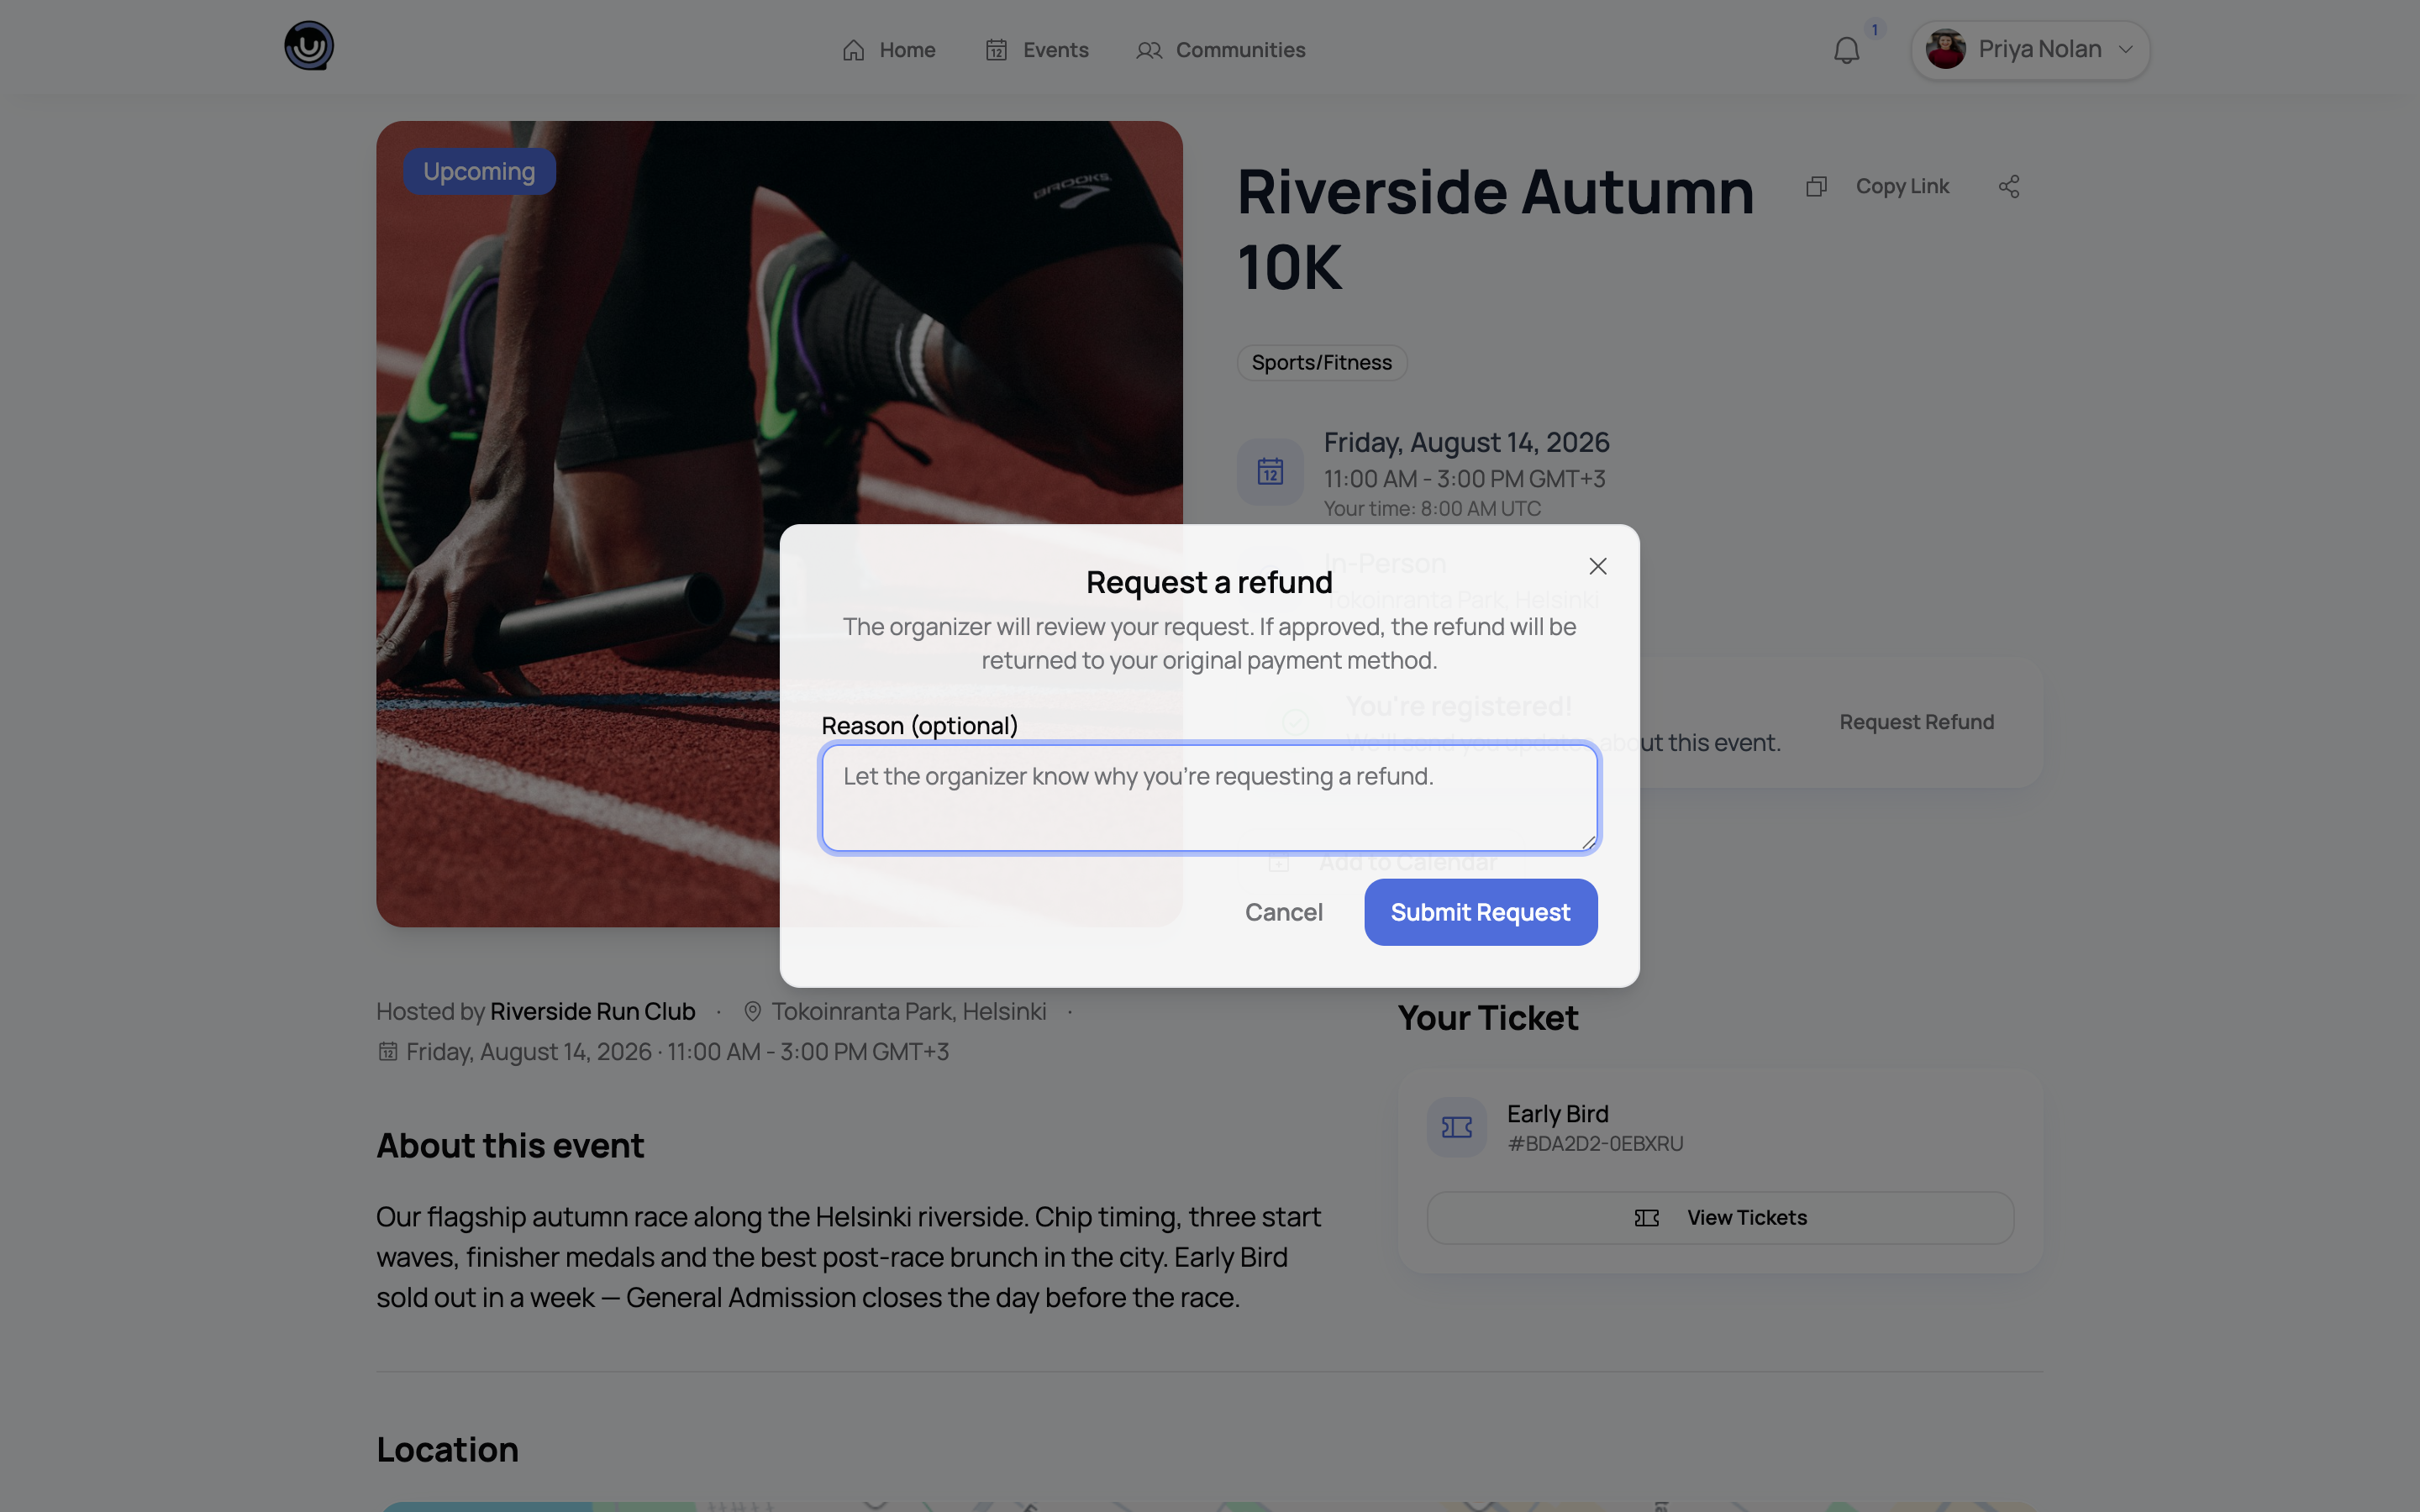
Free and pay-at-door reservations don't go through this refund flow, since no payment was ever taken online — if you can no longer make it, you cancel your reservation instead rather than requesting a refund.
From browsing to your wallet, visualised
The diagram below follows the buyer's path through ticketing: browsing an event, choosing a ticket type, completing checkout under whichever settlement path applies, and ending up with a QR ticket in your My Tickets wallet.
Related guides
- Selling tickets for your event — how ticket types and pricing are set up on the organiser's side
- How event refunds work on YeahApp — the full refund workflow for buyers and organisers
- Checking people in with QR codes — what happens to your QR code at the door
- Types of events you can create — how free, paid and hybrid events differ