
Your member directory
How to find, review, and manage everyone connected to your community — members and guests alike — from segment views to custom profile fields, role changes, and bans.
Your community's People page is the one place to see everyone connected to it — not just the people who've officially joined, but anyone who's shown up to an event, bought a ticket, or filled in a form along the way. Open any name and you get a full profile: what they've attended, what they've submitted, and any custom details you keep on file.
You need Moderator access or higher to open this page. Some actions — inviting, changing roles, removing, and banning — are limited to Admins and the Owner. We'll flag those as we go.
Members and guests, in one place
Everyone on this page is either a member or a guest.
- Members have actually joined your community — they're on your roster.
- Guests haven't joined, but YeahApp recognises them anyway: if someone RSVPs to one of your events, buys a ticket, or fills in a form using their email address, they show up here as a guest, matched automatically by that email.
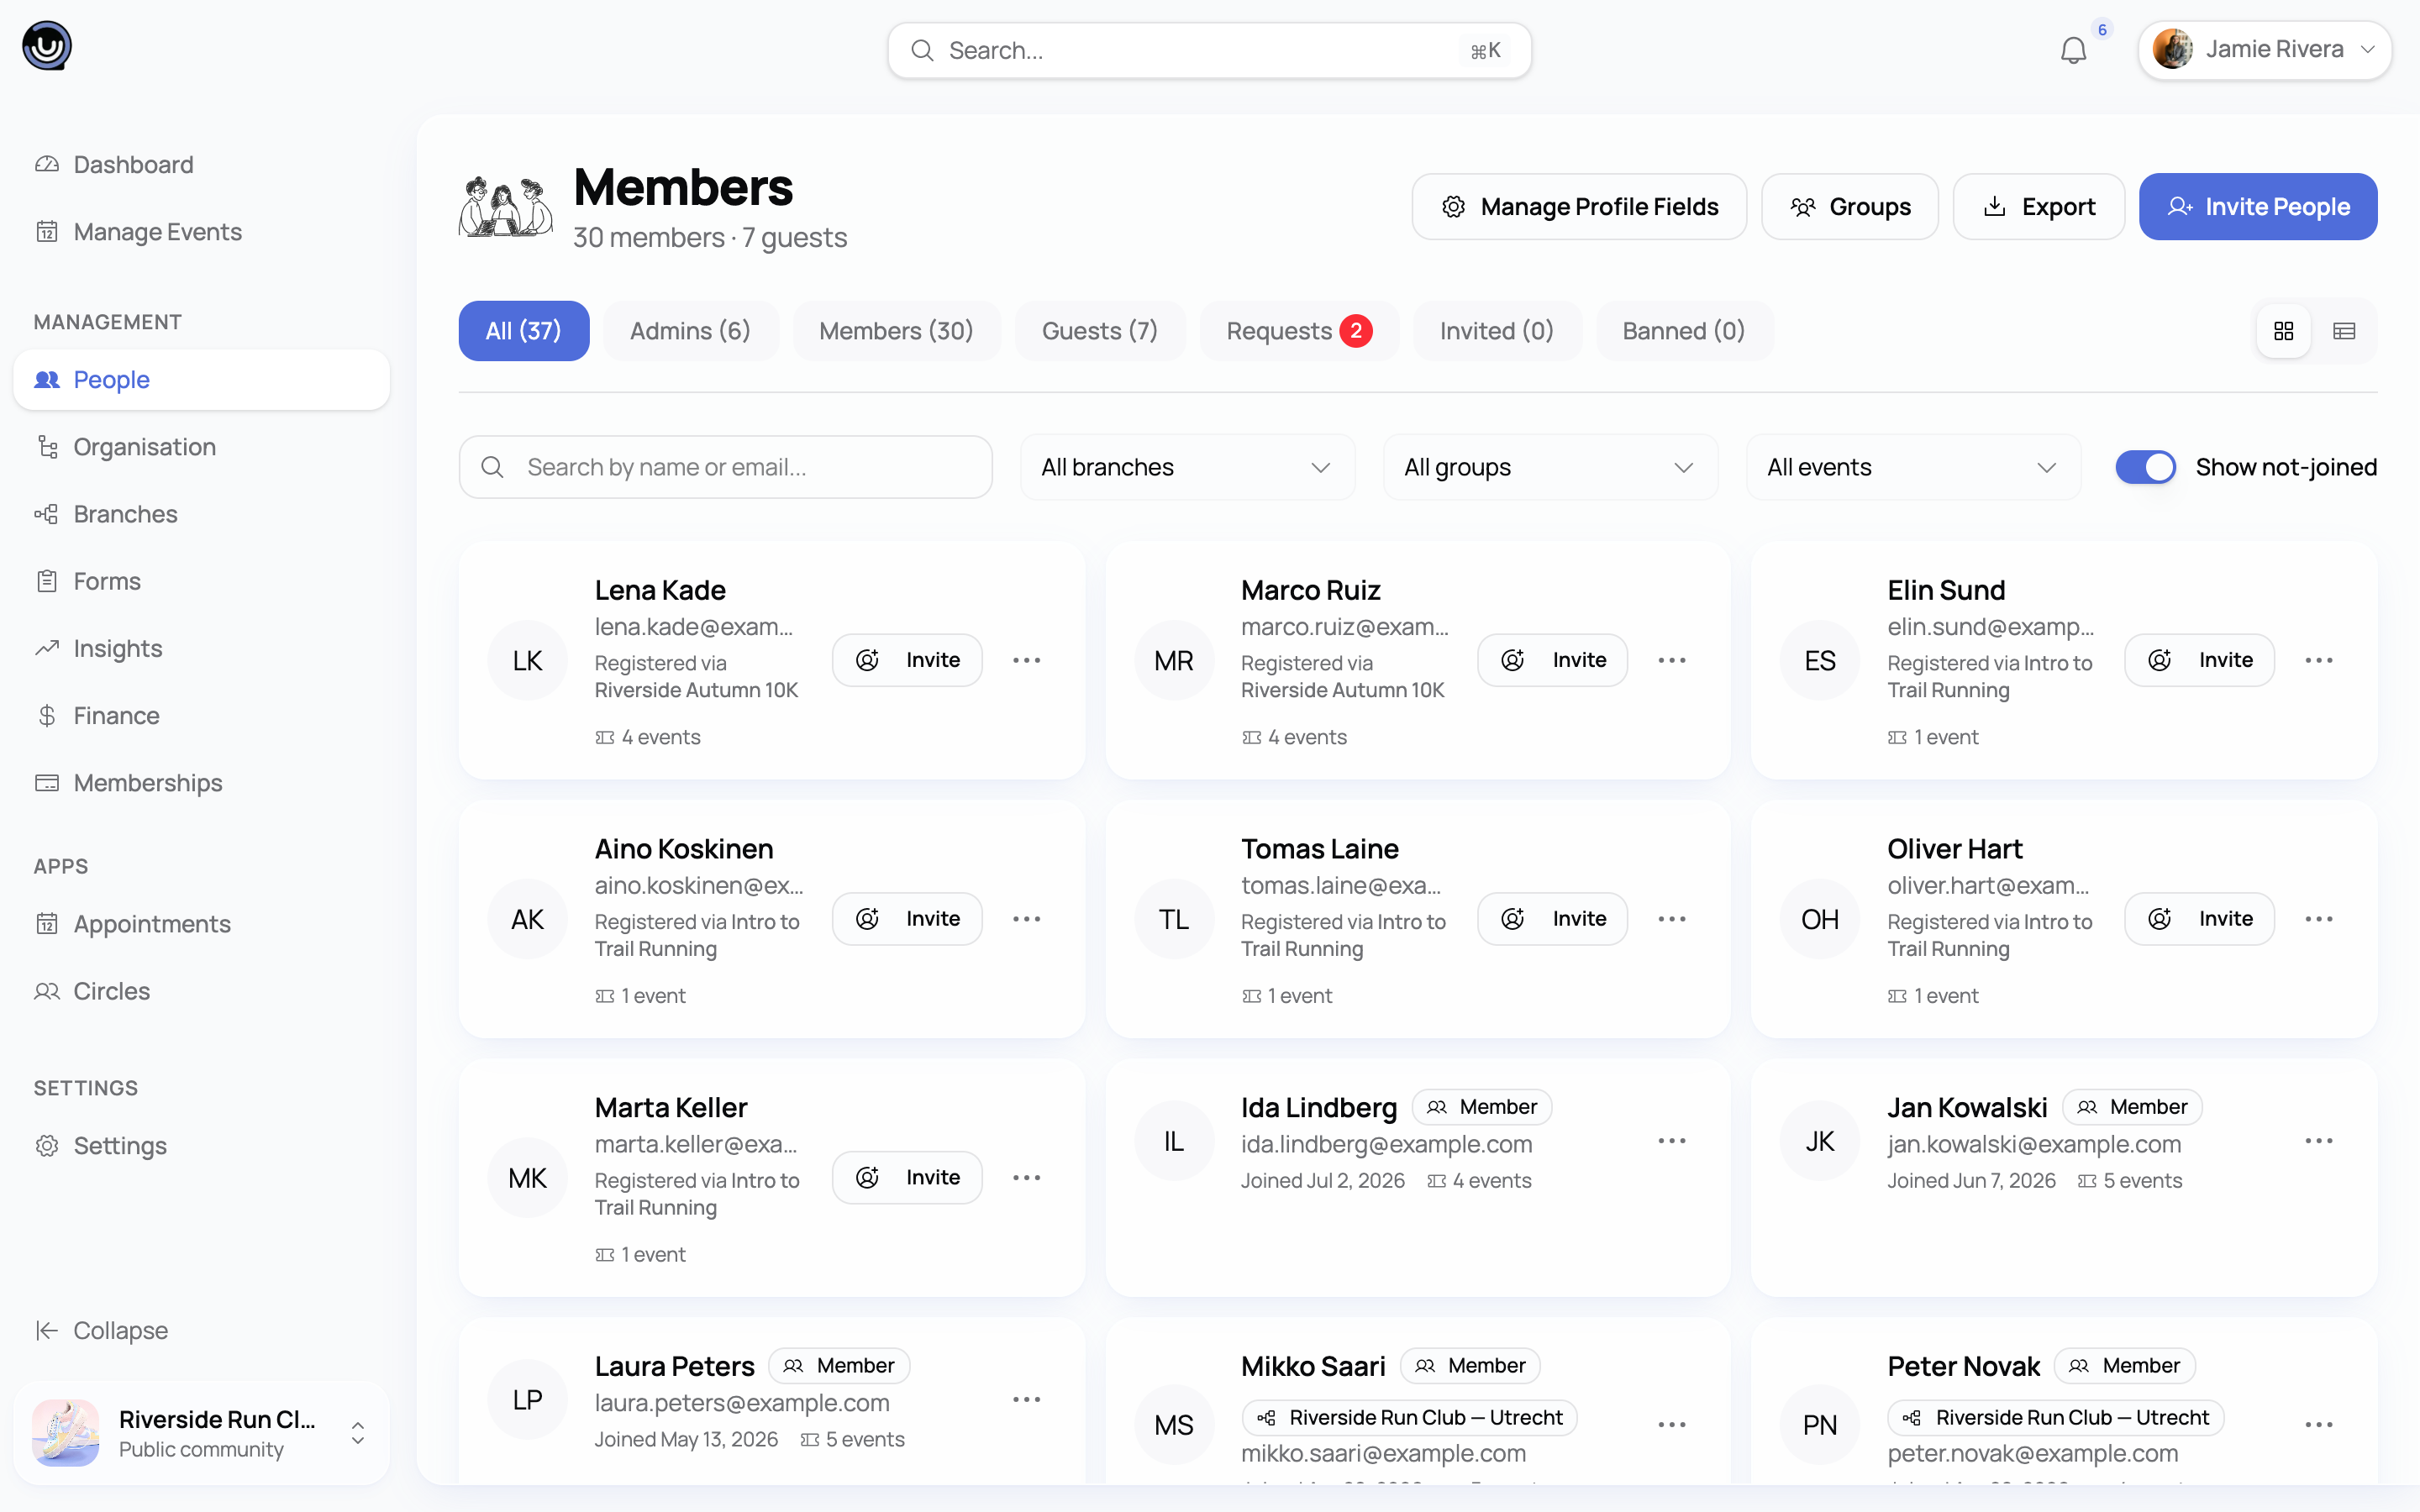
There's nothing to set up for this — guests aren't a list you manage separately, they're simply derived from your event activity. If a guest later joins your community, they move into the members list on their own; nothing needs to be merged by hand. Cards and rows carry a colour-coded badge (green for members, orange for guests) so you can tell them apart at a glance.
What you can do here
From this one page you can view anyone's full profile, invite new people, review pending join requests, and moderate existing members — change a role, remove someone, or ban them. The rest of this guide walks through each of those.
Adding people to your directory
Click Invite People at the top of the page (visible to Admins and the Owner) to bring someone in. You have three ways to do it:
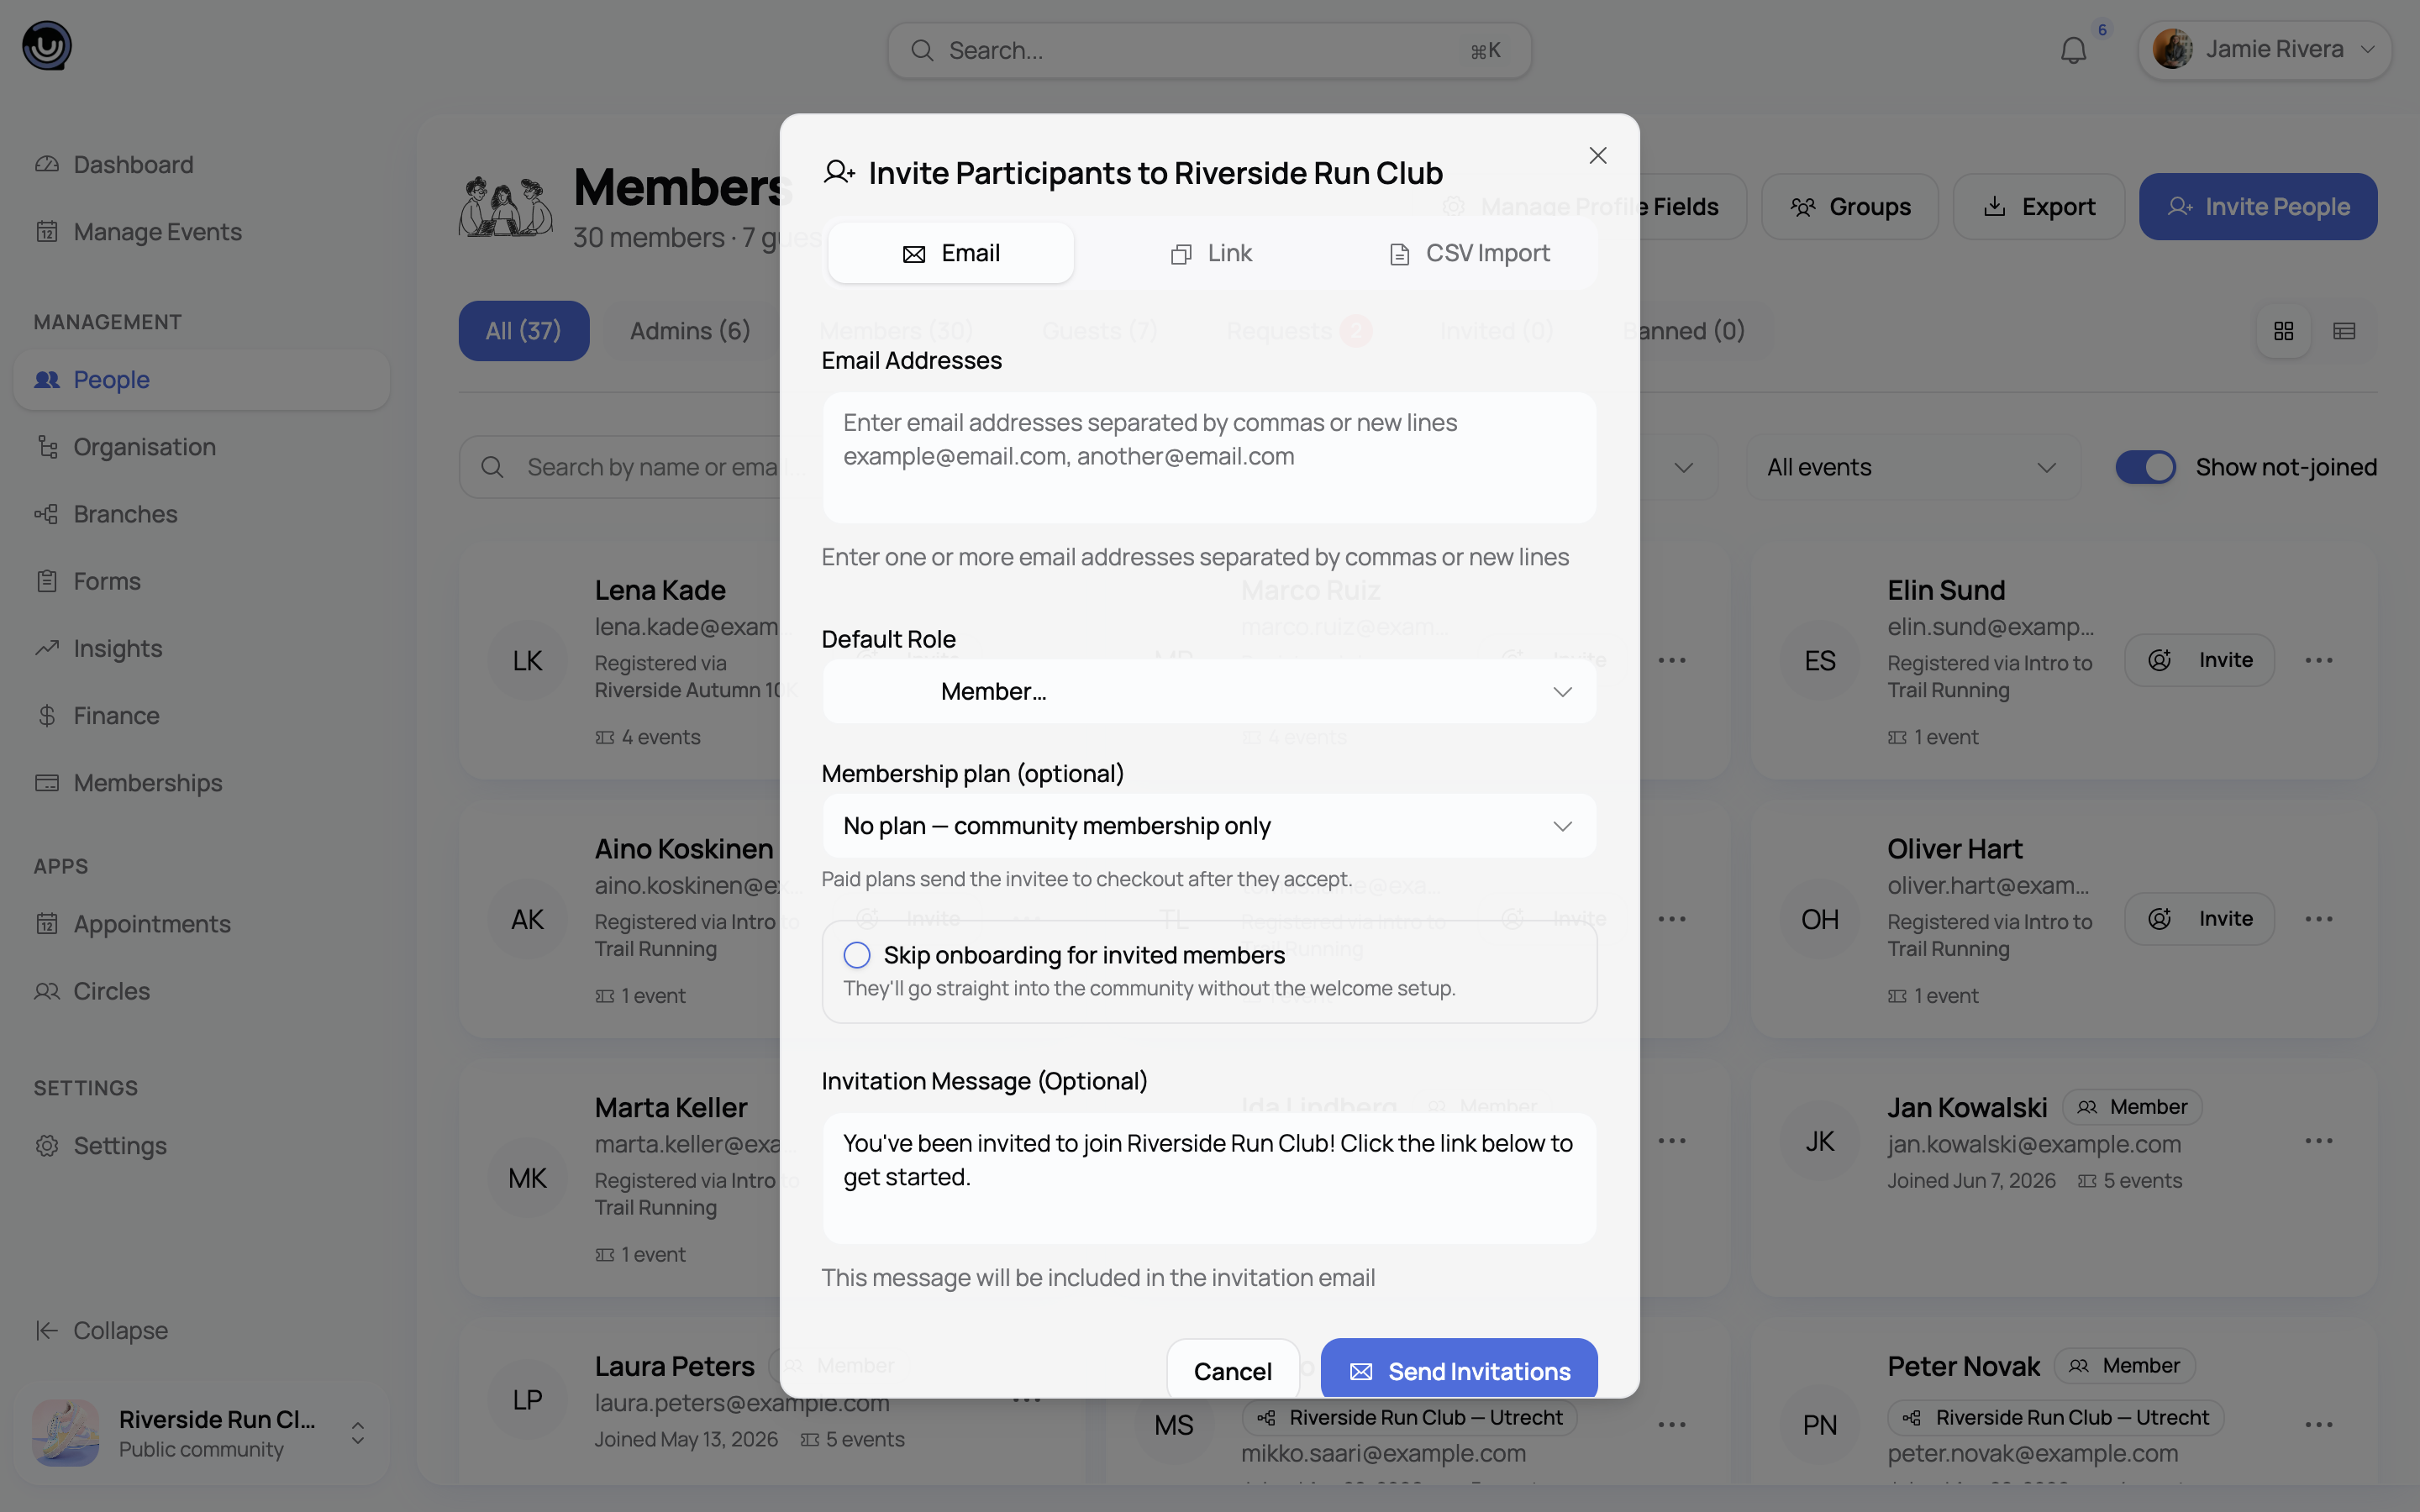
- Email invite — send an invitation to a specific address. It expires after 7 days by default.
- Invite link — generate a reusable link you can share anywhere; set your own expiry.
- CSV import — bring in a whole spreadsheet of people at once.
Accepting an invite adds someone straight away — it skips any join-request review, even if your community normally requires approval to join.
For the full walkthrough of bulk imports, including custom fields and profile data, see Importing members from a spreadsheet.
Finding people
Segment tabs
The page is split into tabs so you can jump straight to the group you're after:
| Tab | Shows |
|---|---|
| All | Every member and guest |
| Admins | Members with the Admin or Moderator role |
| Members | Everyone who's joined |
| Guests | Everyone recognised from event activity who hasn't joined |
| Requests | Pending join requests, with a badge showing how many are waiting |
| Invited | People you've invited by email who haven't accepted yet |
| Banned | Everyone currently banned |
Invited and Banned only appear if you have permission to invite, remove, and ban members.
Search and filters
A search box matches by name or email across the current tab. An event filter narrows the list down to people connected to one specific event — handy when you want to see who came to a particular session rather than your whole community.
Card or table view
Toggle between a card layout and a table layout at any time; your choice carries across tabs. Table view is denser and adds a couple of extra columns, like join date and gender where it's on file.
The Gender column shows what the person set on their own profile, or confirmed when registering for a men-only or women-only event — that answer is saved to their account for good. It reads "Not set" for anyone who hasn't given one. You can't change it from the directory: it belongs to the member, not to you, and it isn't included in the member CSV export. Since only Moderators and above can open this page at all, ordinary members never see the column.
The person detail page
Click any name to open their full profile. You'll find:
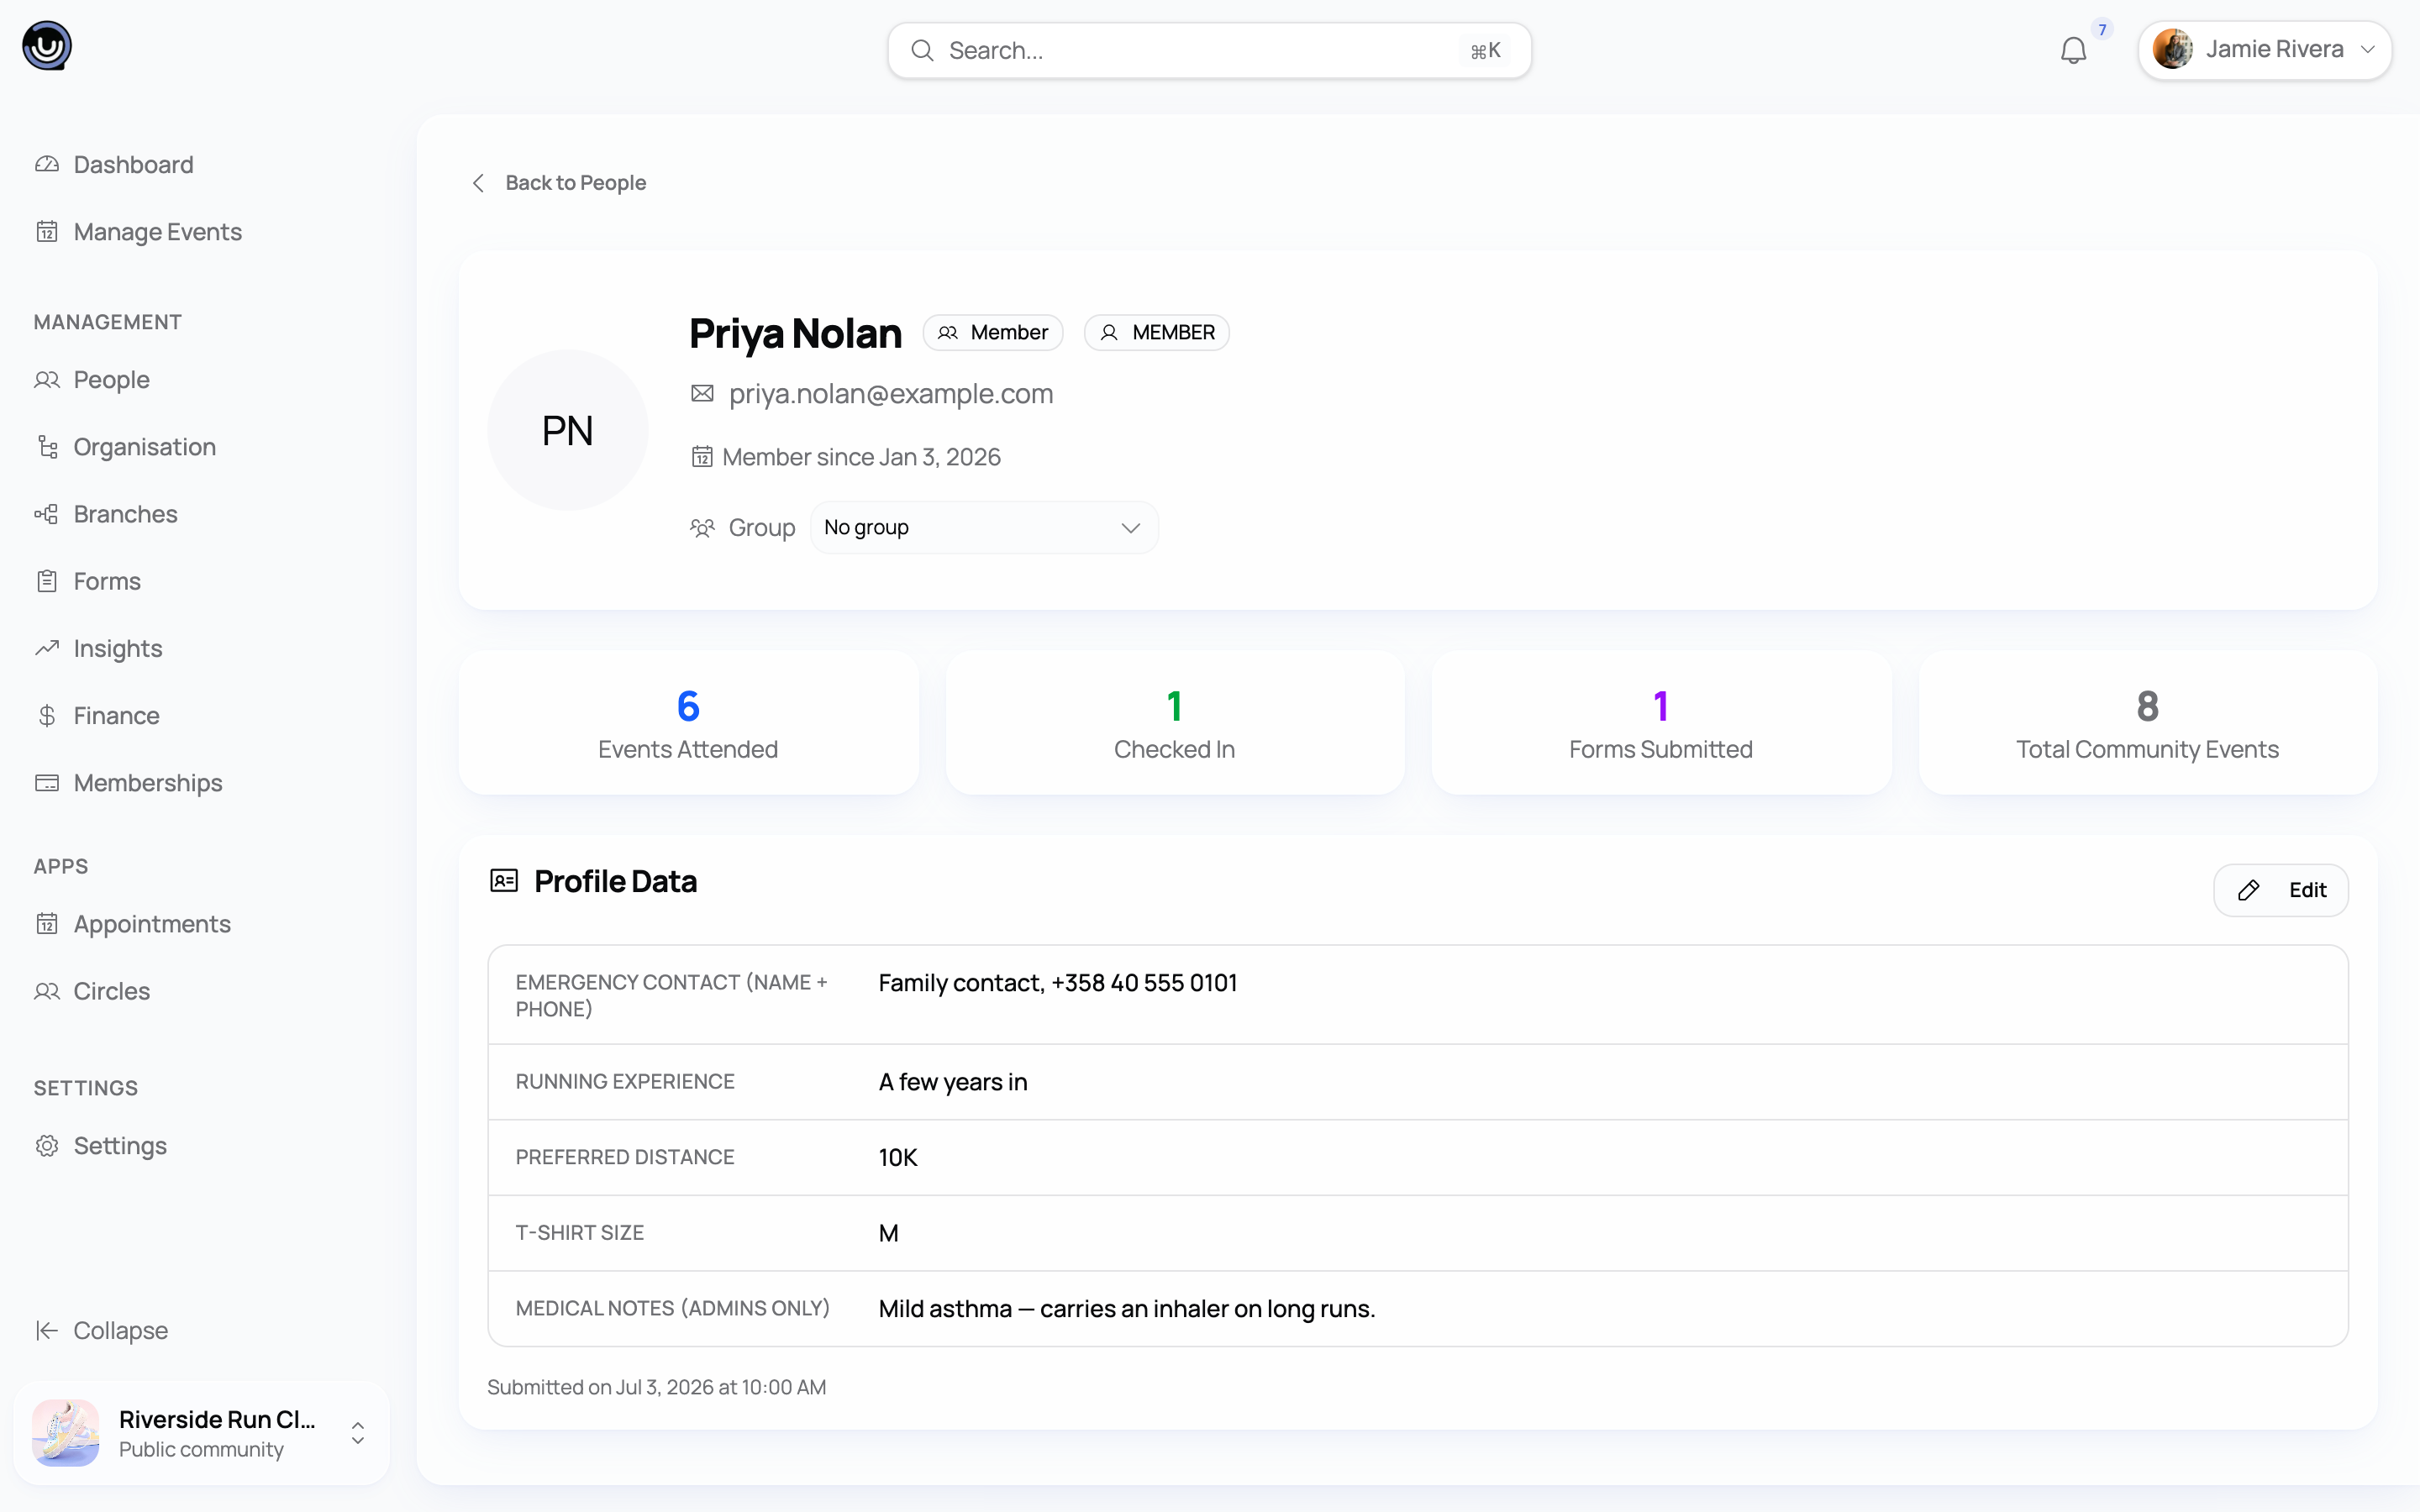
- Header — avatar, name, member or guest badge, role badge, email, and either "Member since" or "First attended" depending on their type.
- Stats — events attended, times checked in, forms submitted, and how many events your community has run in total.
- Events attended — every event they've been to, with date, location, and whether they checked in.
- Form submissions — every form they've filled in, with its status.
- Profile Data — your community's custom fields (see below), shown for members with their current values; fields nobody has answered yet read "Not set" rather than disappearing.
Heads up. If Admins or the Owner have permission to edit registration details, they can fill in or correct a member's profile fields directly from this page — even for someone who never submitted anything themselves, like a member you added by CSV. Each field gets the right kind of input (a dropdown for single-choice fields, checkboxes for multi-choice, a date picker for dates, and so on), so you can backfill missing information without chasing the member down.
Group assignment
On the Business plan, you can also assign a member to one group directly from their profile — useful for organising your roster beyond role and event history. See Member groups and access control for how groups work and what they unlock.
Custom profile fields
Beyond the built-in details, you can define your own fields for members — things like department, T-shirt size, or dietary requirements. Manage them from Manage Profile Fields, linked from the top of the People page. There are two kinds:
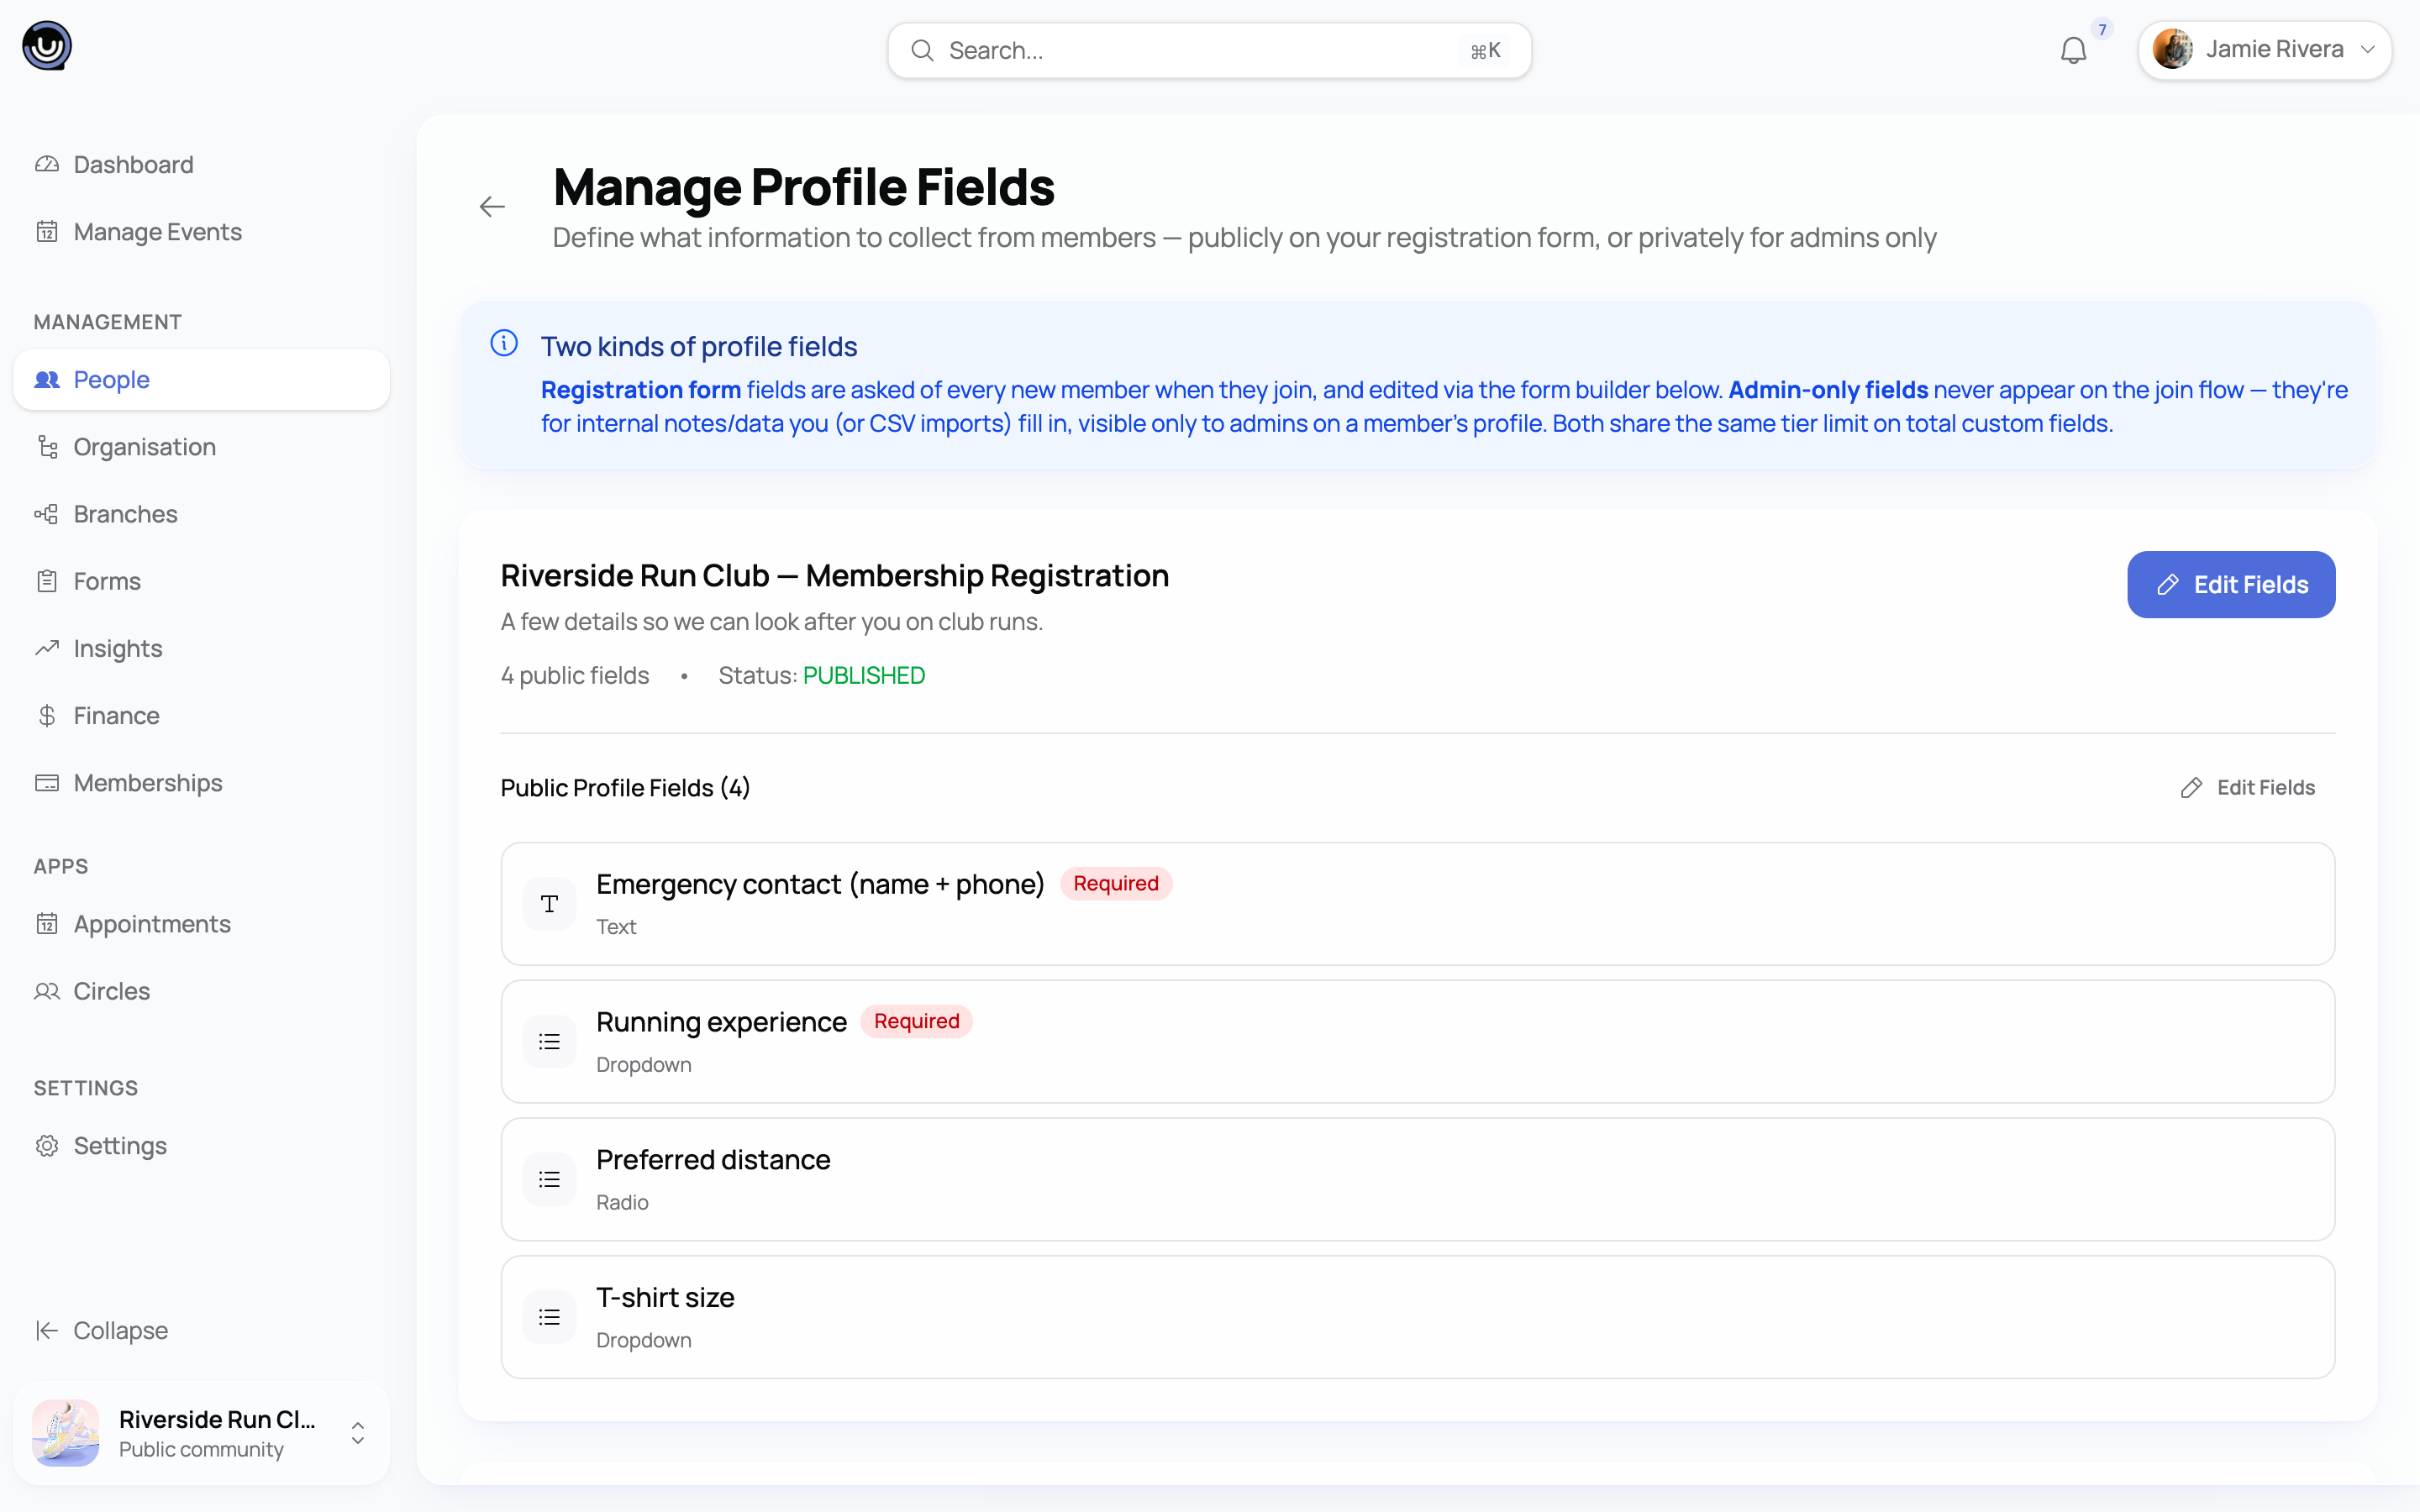
- Registration fields — public. These appear on your community's join form, so members answer them when they sign up (or you can fill them in yourself afterwards).
- Admin-only fields — private. Only you and other managers see these; members are never asked to fill them in.
When you add a field from this page, you pick from ten types: Text, Email, Phone, Number, Date, Single select, Multi select, Checkbox (yes/no), URL or Long text. The full form builder, where public registration fields are edited, offers more on top of those — radio buttons, time and date-and-time pickers, ratings, file uploads and signatures. Whatever you add also becomes a column when you import members by CSV (available on every plan) and when you export your roster back out to a file (a Business-plan feature).
In that roster export, choice answers come out exactly as you wrote the option labels — "Friend or Family", not a shortened code. Multiple-choice answers are joined with a semicolon, so a single cell reads Networking Events; Workshops, and yes/no tick boxes export as Yes or No. That's true whether the answer arrived through a spreadsheet import or from someone filling in your join form.
Heads up. Starter communities can add up to 5 custom fields in total, and admin-only fields aren't available on Starter — every field a Starter community creates goes on the public registration form. Pro and Business have no limit on field count, and both unlock the private, admin-only kind.
For reordering fields, editing an existing field's options, or marking one as required, use the full form builder — see Building forms for registration and events.
Changing someone's role
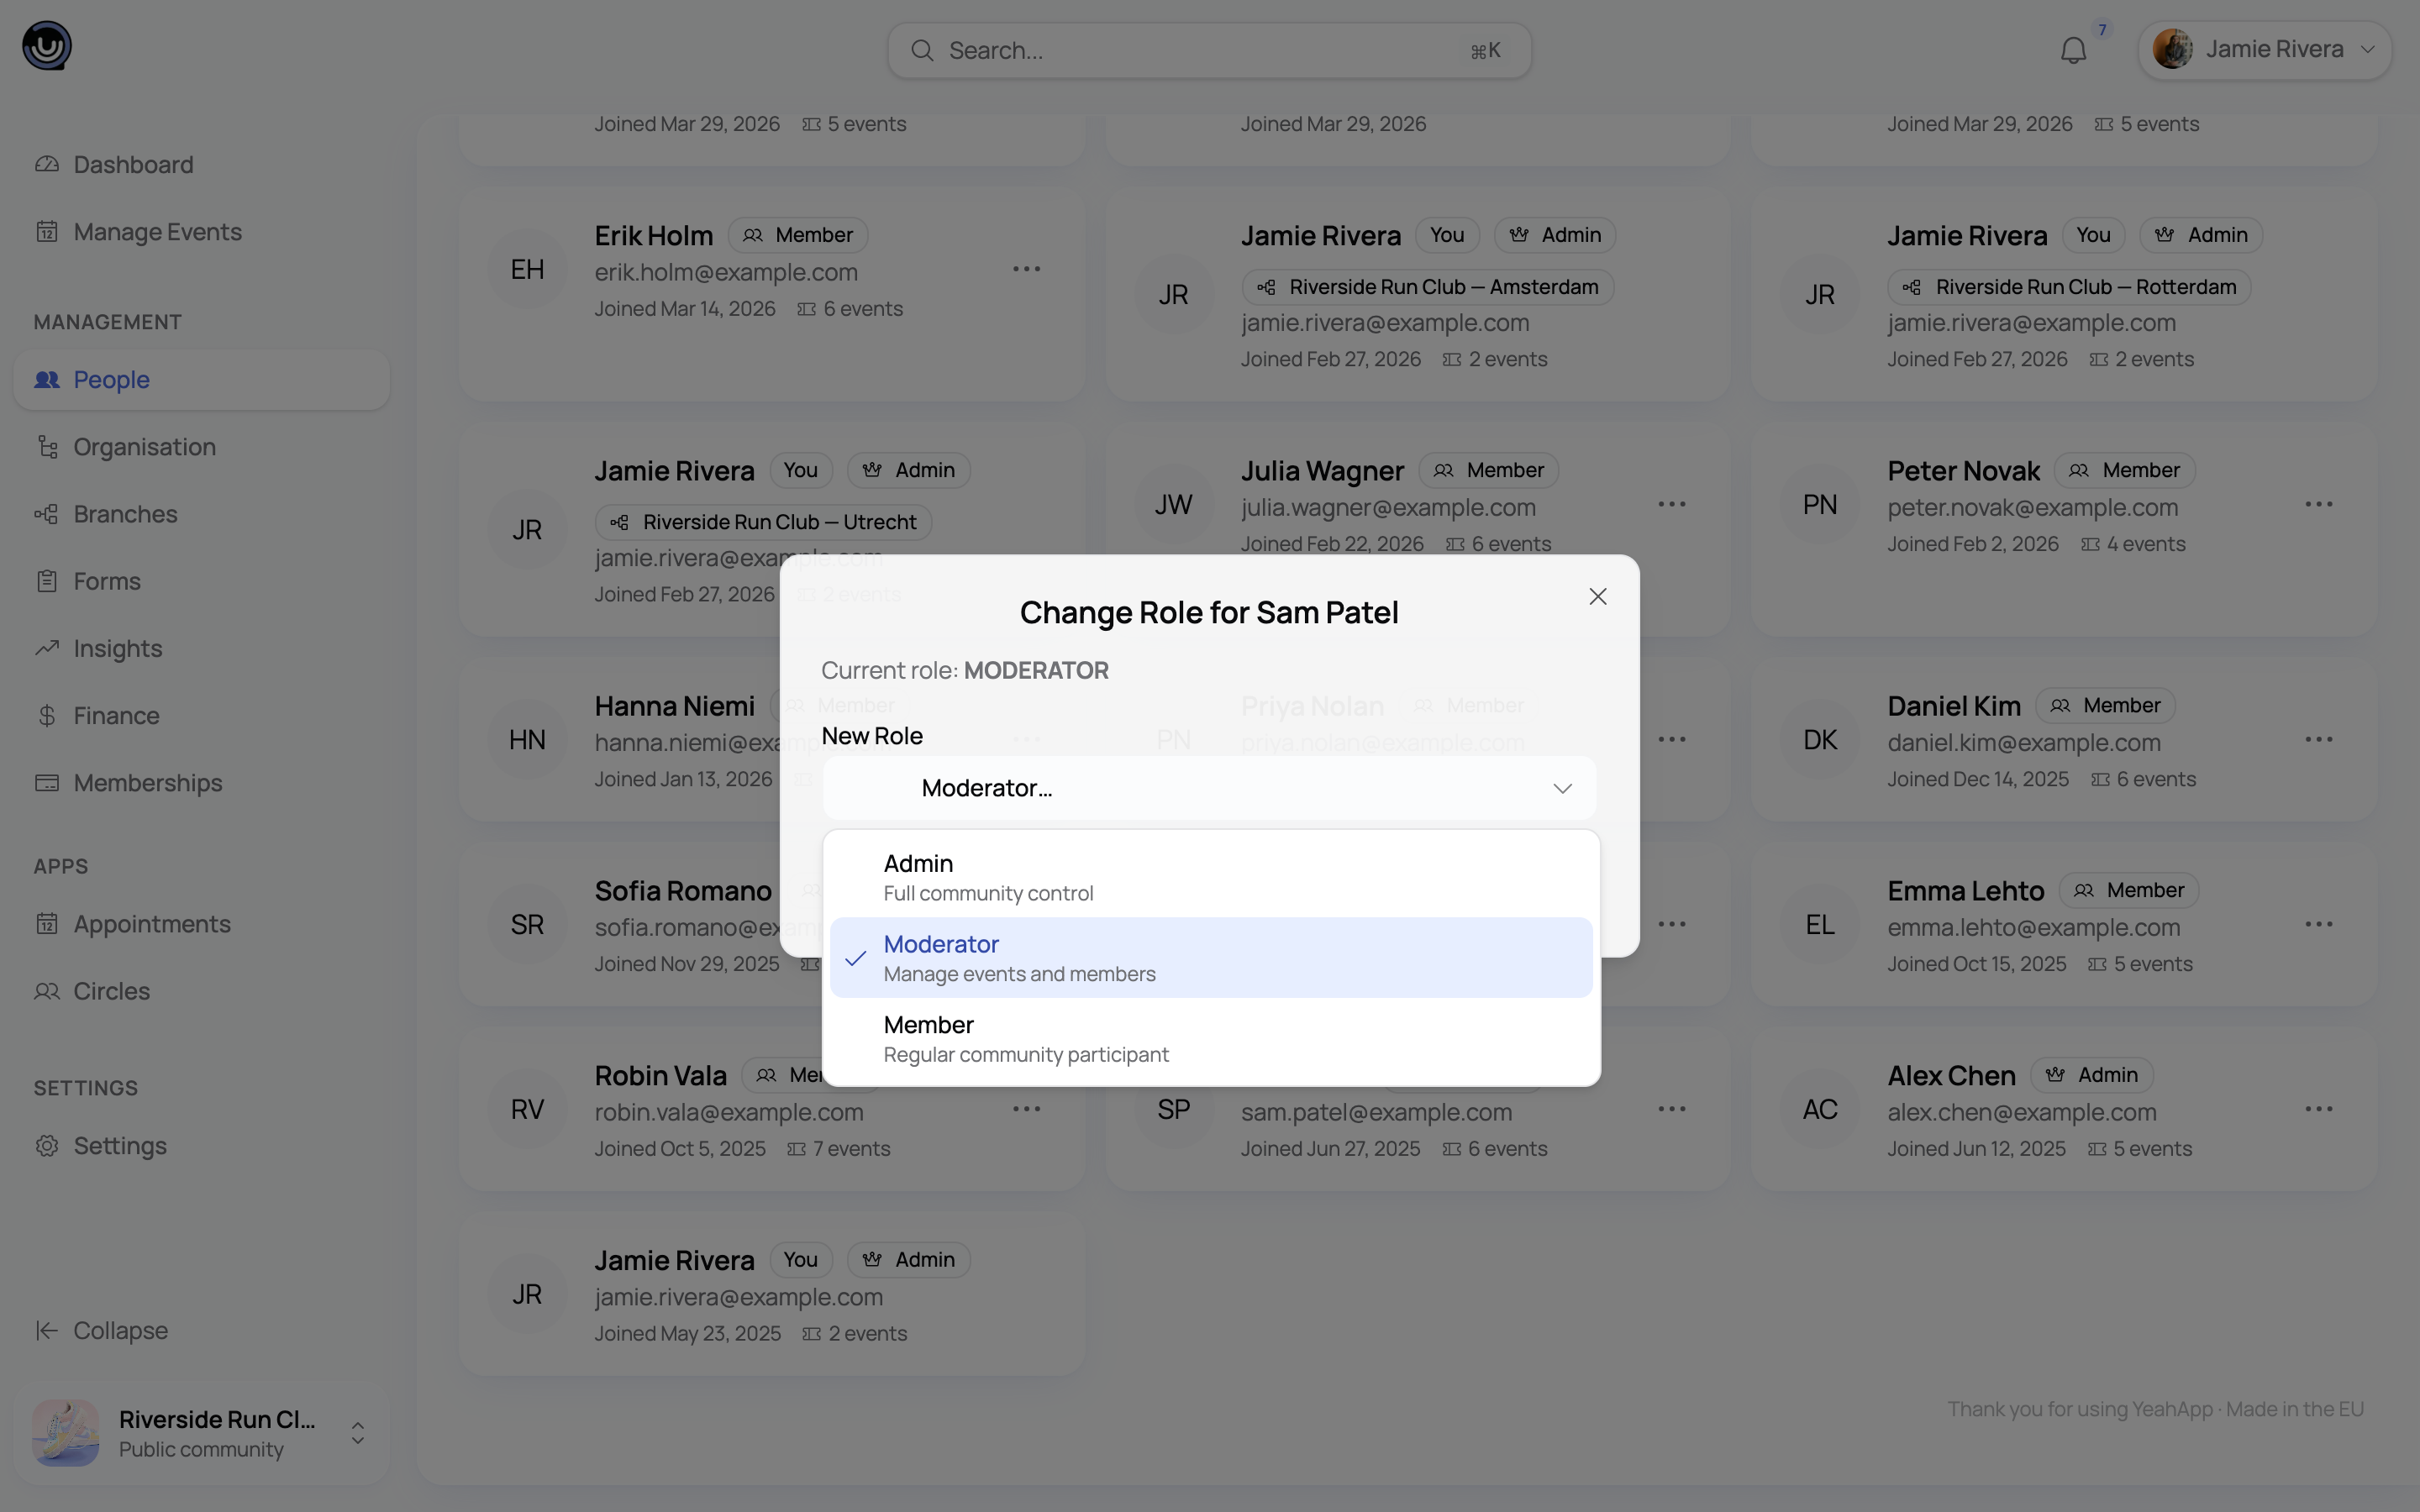
Only Admins and the Owner can change a member's role. Open the row's menu (or their profile) and choose Change Role, then pick Admin, Moderator, or Member. The member is notified of the change.
For what each role can actually do, see Community Roles & Permissions.
Approving or rejecting join requests
If your community requires approval to join, requests land under the Requests tab, with a badge showing how many are pending. Admins and Moderators can both review these. Each request shows who's asking, when, and — if your join flow includes a form — a preview of their answers.
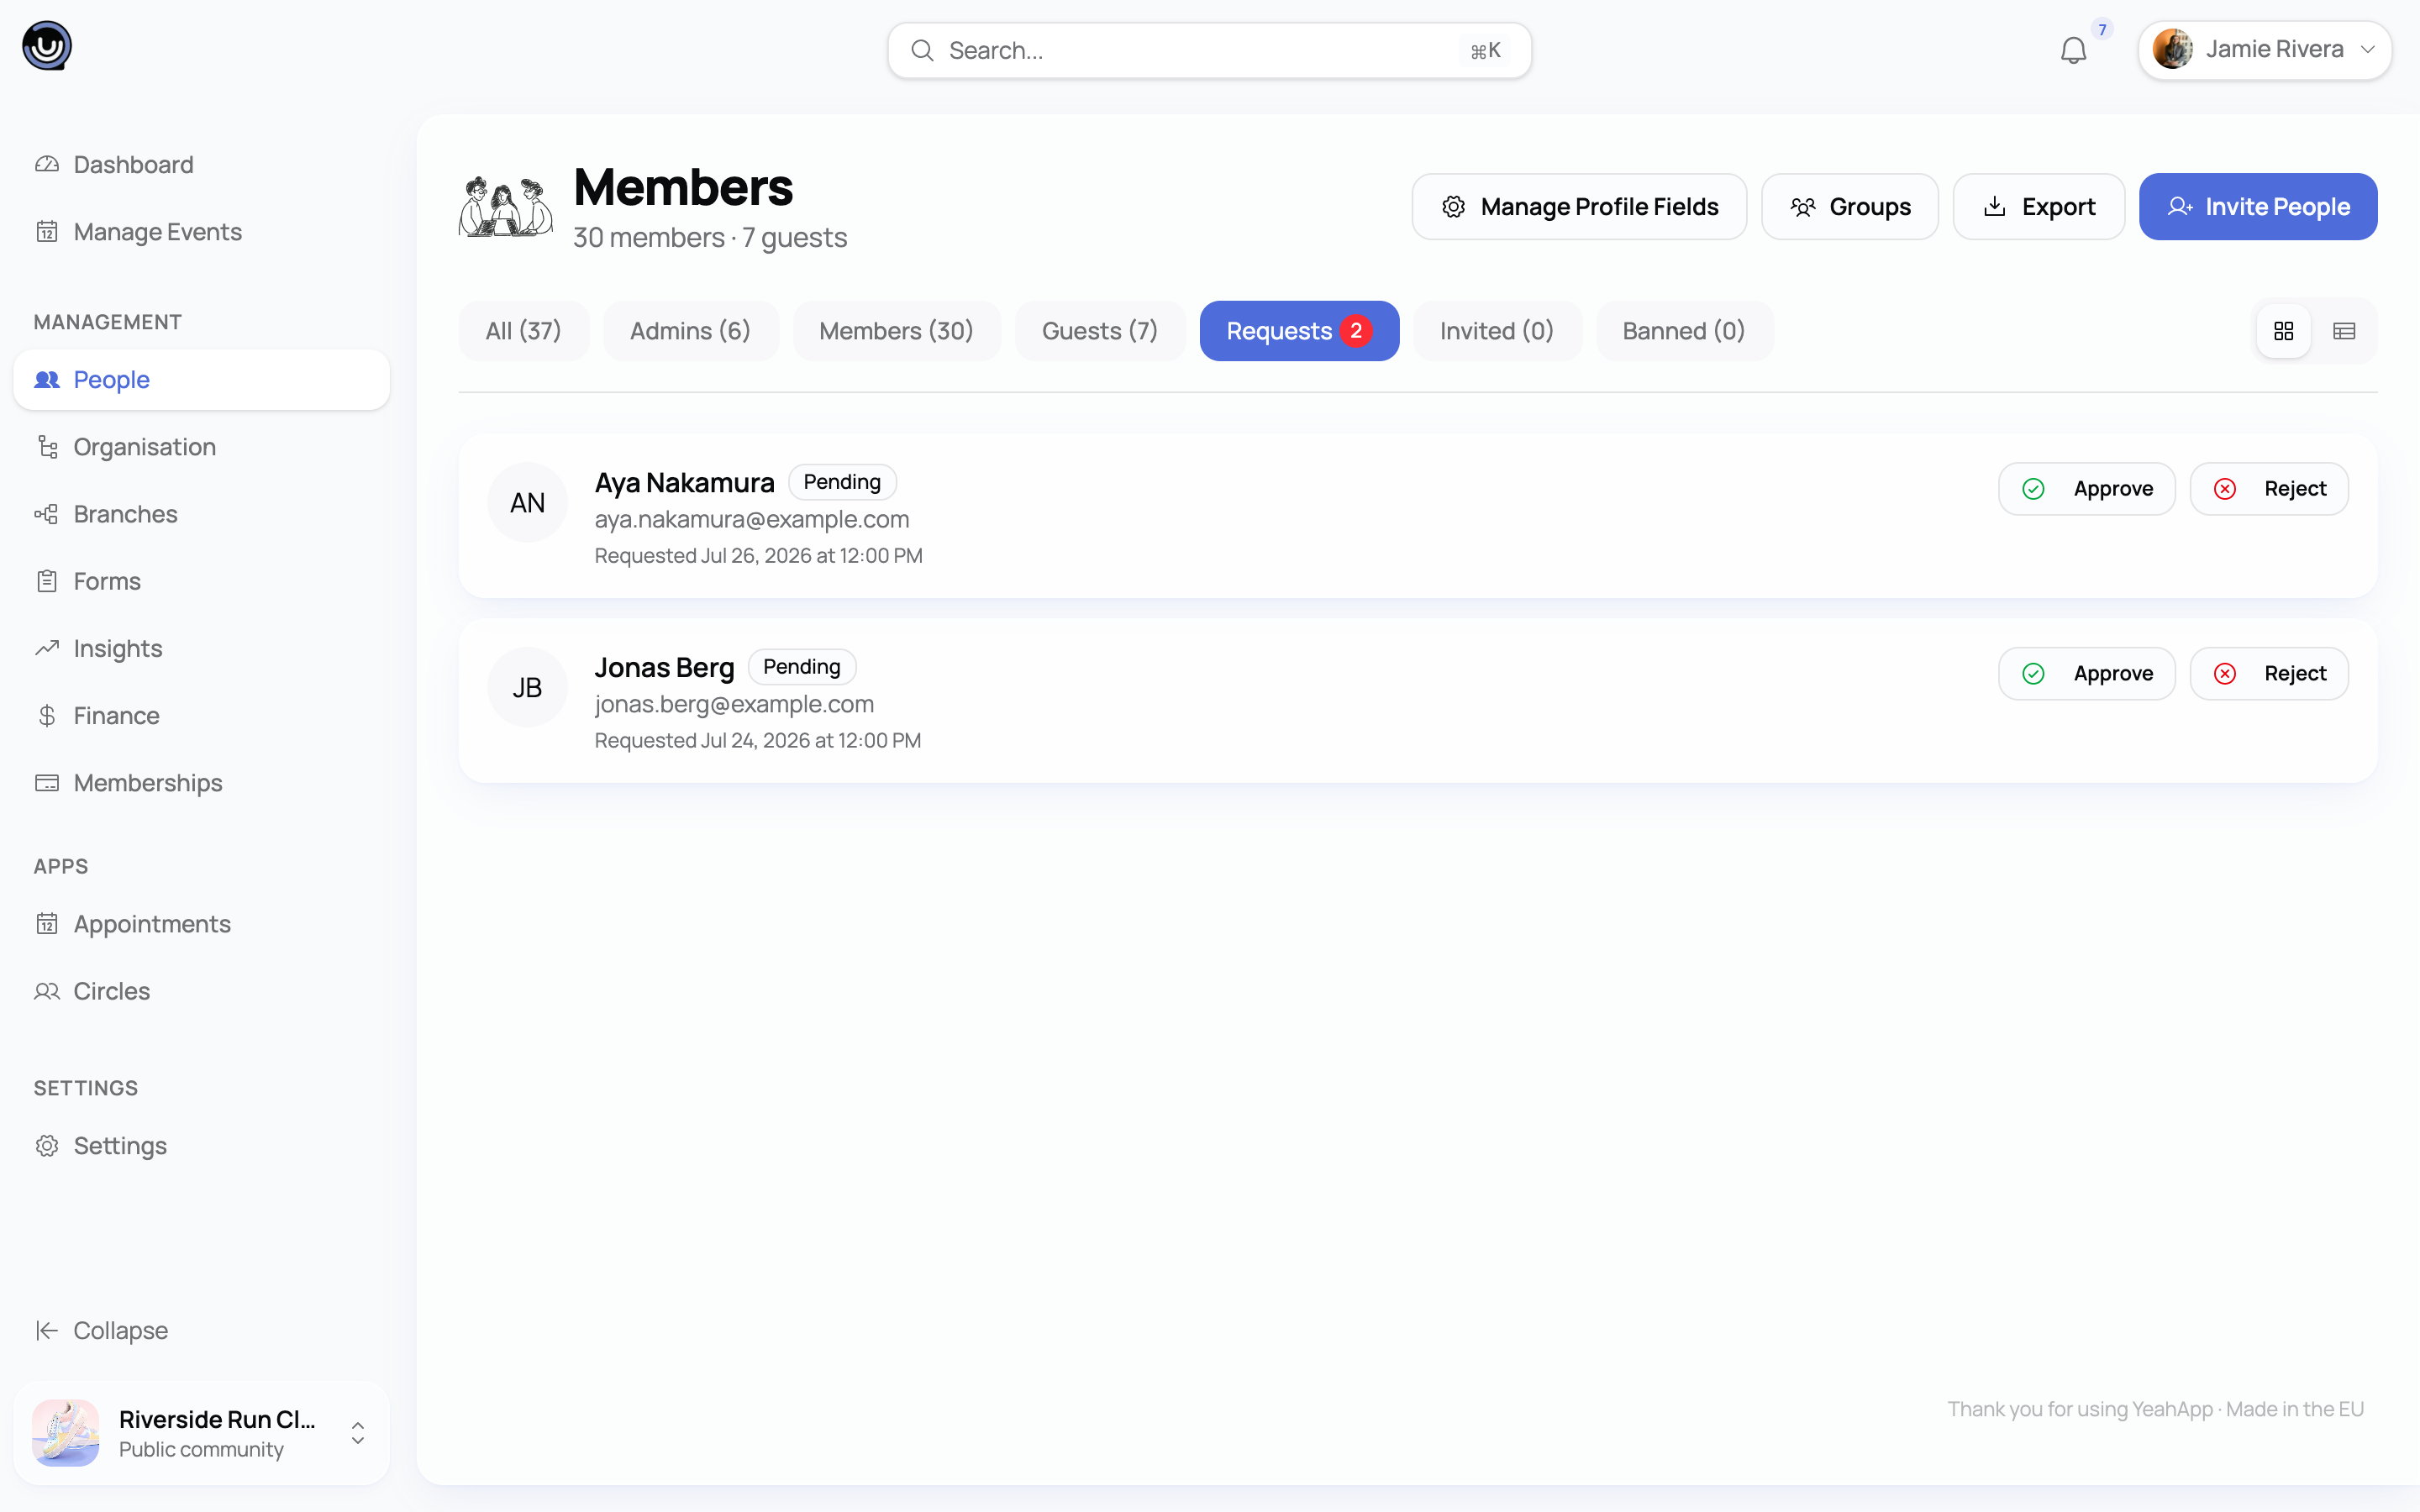
- Approve adds them as a Member straight away, as long as your community still has room under its member limit.
- Reject turns the request down; you can leave a private note for your own records.
Either way, the person is notified of the outcome. If your community charges for membership, approving a request sends the person a payment link instead of activating them immediately — they become a member once they've paid.
Removing or banning a member
Losing access to a community isn't all the same thing. There are three distinct paths, and only two of them are things you do to someone else:
- Leave — the member's own choice. The Owner can't leave without transferring ownership first.
- Remove — you end their membership, but they're free to come back later, whether by requesting to join again or accepting a new invite. Admins and the Owner only.
- Ban — you end their membership and block them from rejoining until you lift the ban. Admins and the Owner only.
Heads up. Removing and banning aren't interchangeable. Removing someone just ends their current membership — nothing stops them from returning. Banning does the same, plus it actively blocks rejoining until you unban them.
When you ban someone, you can add an optional reason for your own records, and choose whether the ban is permanent or lifts automatically after a set date. You can also lift a ban manually at any time from the Banned tab. You can't ban the community Owner, and you can't ban someone who's already banned.