Getting your community verified
How to submit your community for the Verified badge — as a single community or once for every community your organisation owns — and what the badge does and doesn't do.
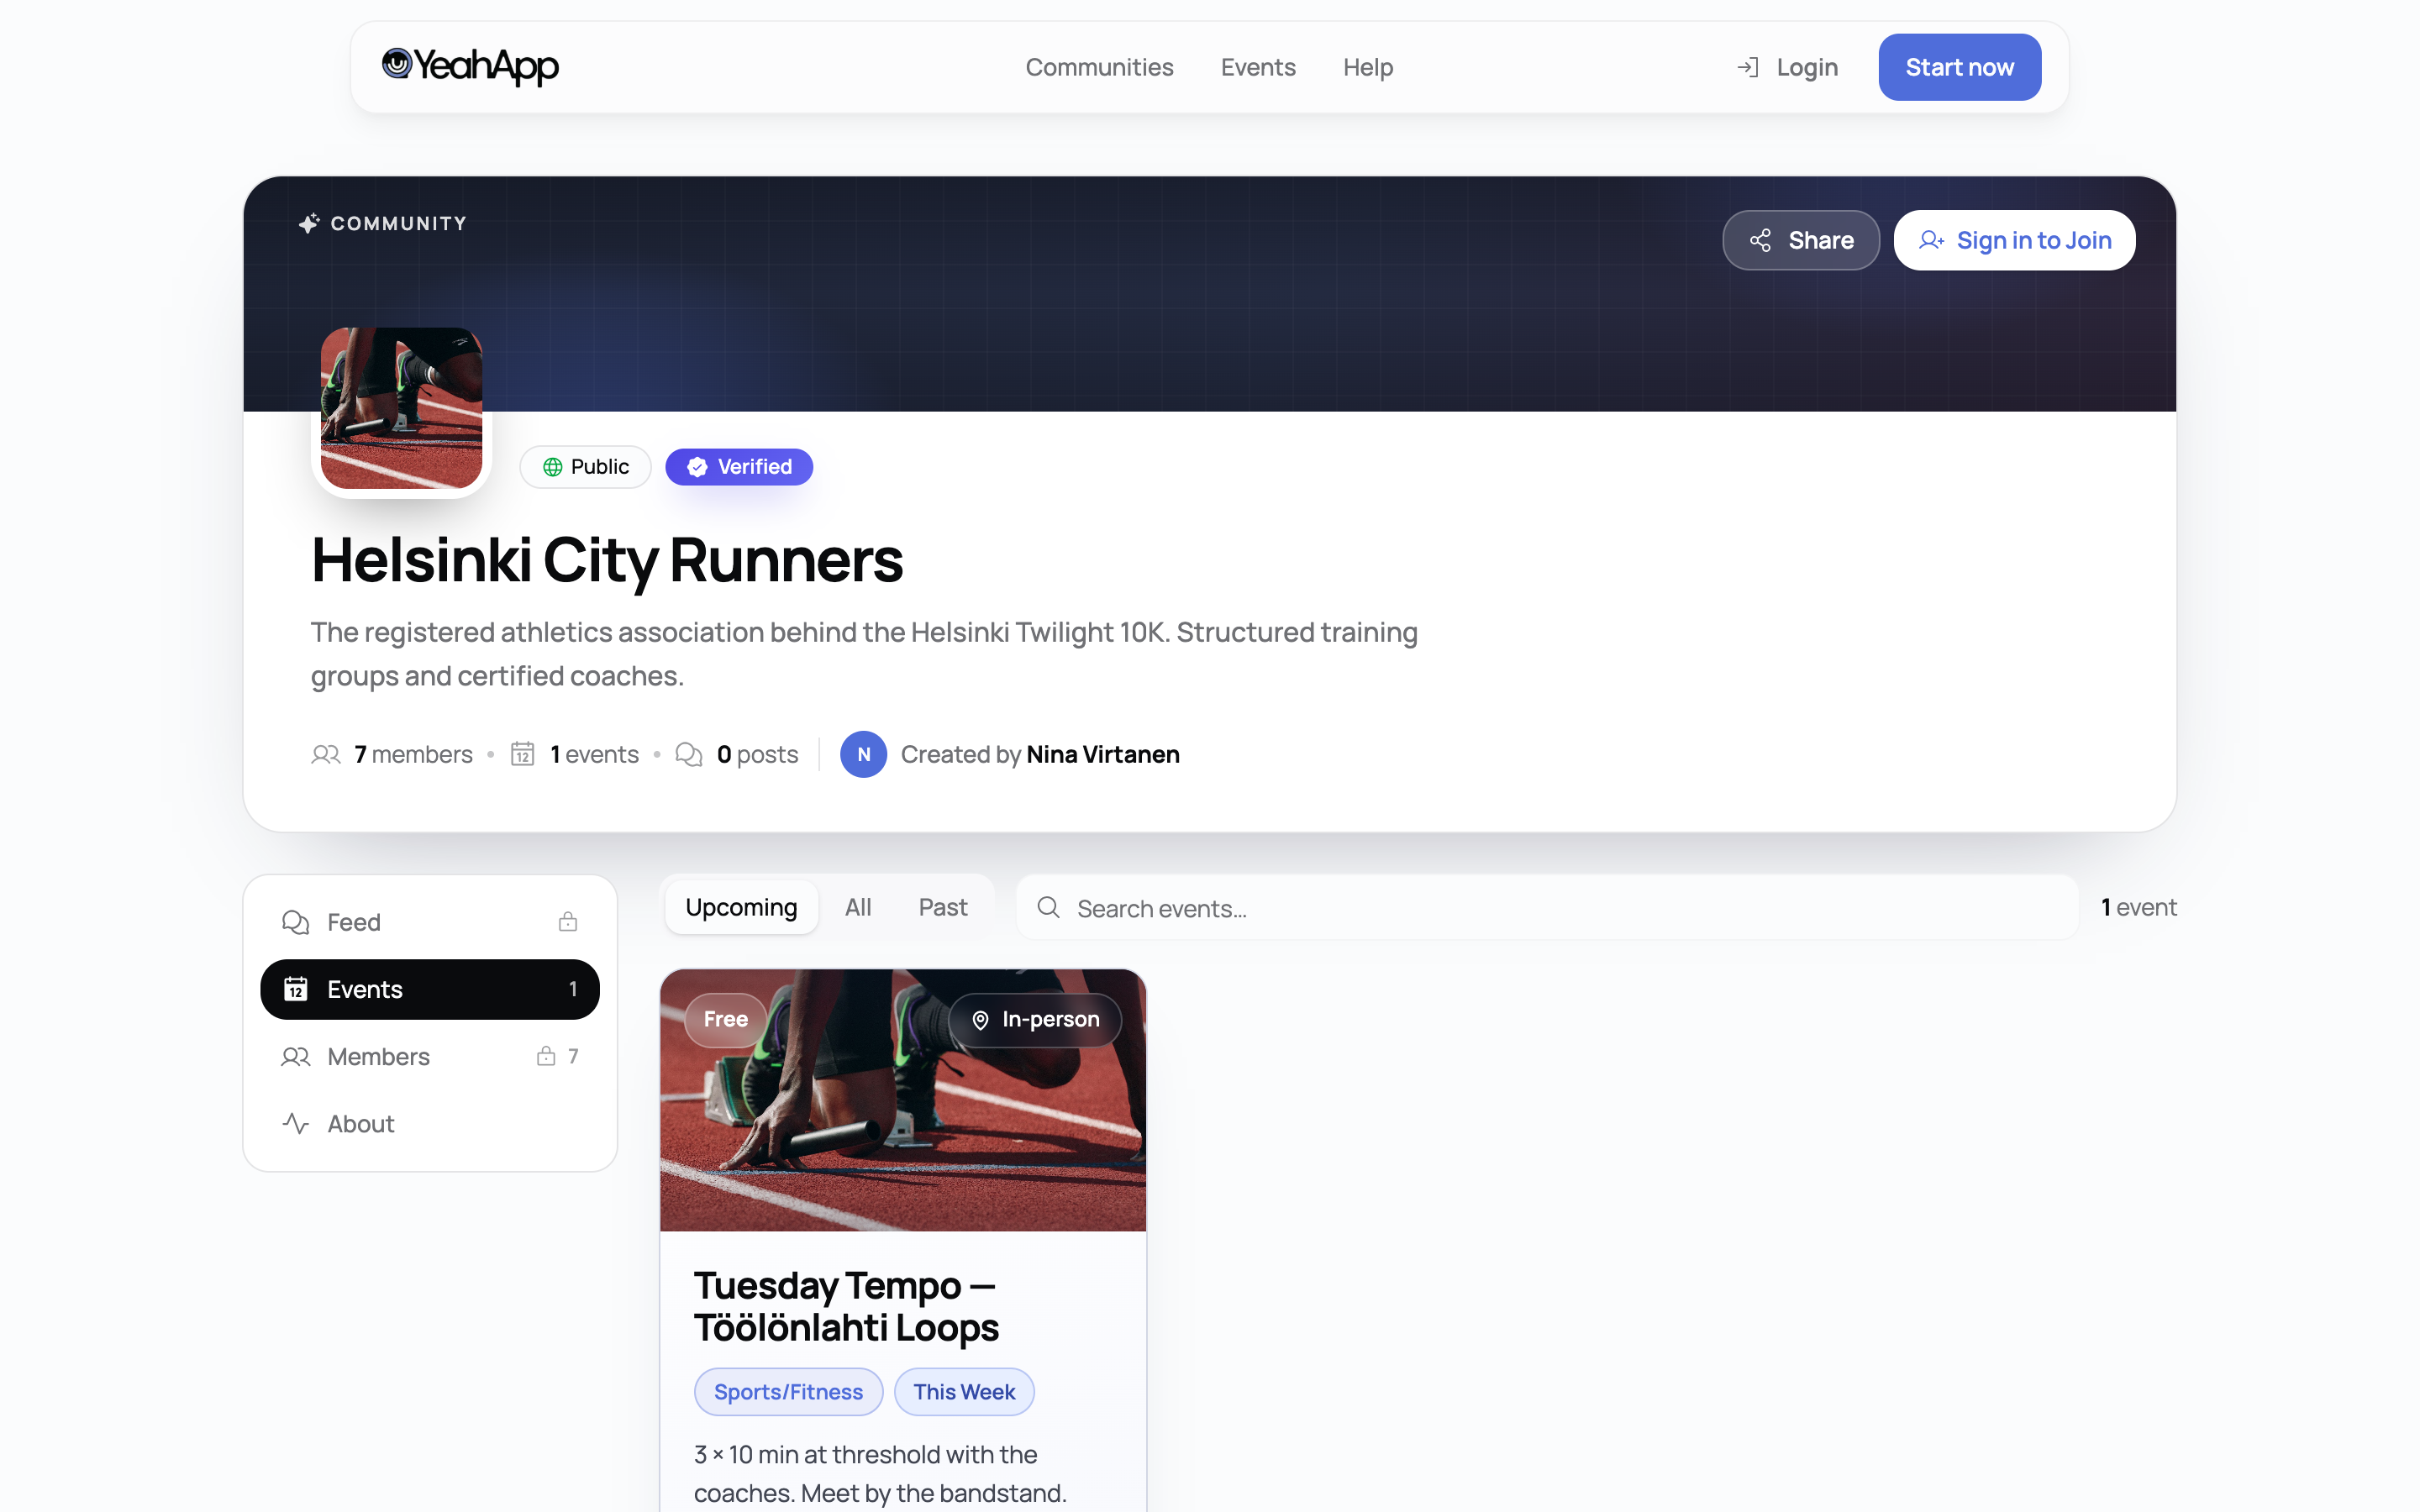
The Verified badge is a small mark next to your community's name that tells members and visitors you've proven who you are — a real, registered organisation, not an anonymous page. This guide covers how to submit for it, the two ways to get it, and what to expect from the review.
Heads up. Verification is a trust signal. It doesn't unlock any feature, raise any limit, or change your platform fee. Beyond the badge itself, the only thing it changes is the wording on your public donation pages: verified communities get a shorter note saying the contribution goes to you to support the event, while unverified ones carry a longer disclaimer explaining that the contribution isn't a tax-deductible charitable donation and that YeahApp hasn't verified the organisation. Either way, neither wording promises donors a tax deduction — being verified on YeahApp is not the same as being a registered charity.
What you need to submit
Verification is a manual review, not an automated check. Whichever path you use (below), you'll be asked for the same three things:
- Registered legal name — your organisation's official name.
- Registration number — your business, non-profit, or association registration number.
- Certificate of registration — a PDF or image of the document proving the above, up to 8 MB.
A platform admin reviews what you submit and approves or rejects it by hand. There's no automatic pass.
Heads up. Verifying a single community (Path 1) needs that community on an active subscription. If its billing has lapsed you can still see the status of a previous request, but you can't submit a new one until you're back on a paid plan. Verifying an organisation account (Path 2) has no billing requirement — it's tied to your account, not to any one community's plan.
Path 1: verify a single community
This is the standard path, and the one most communities use.
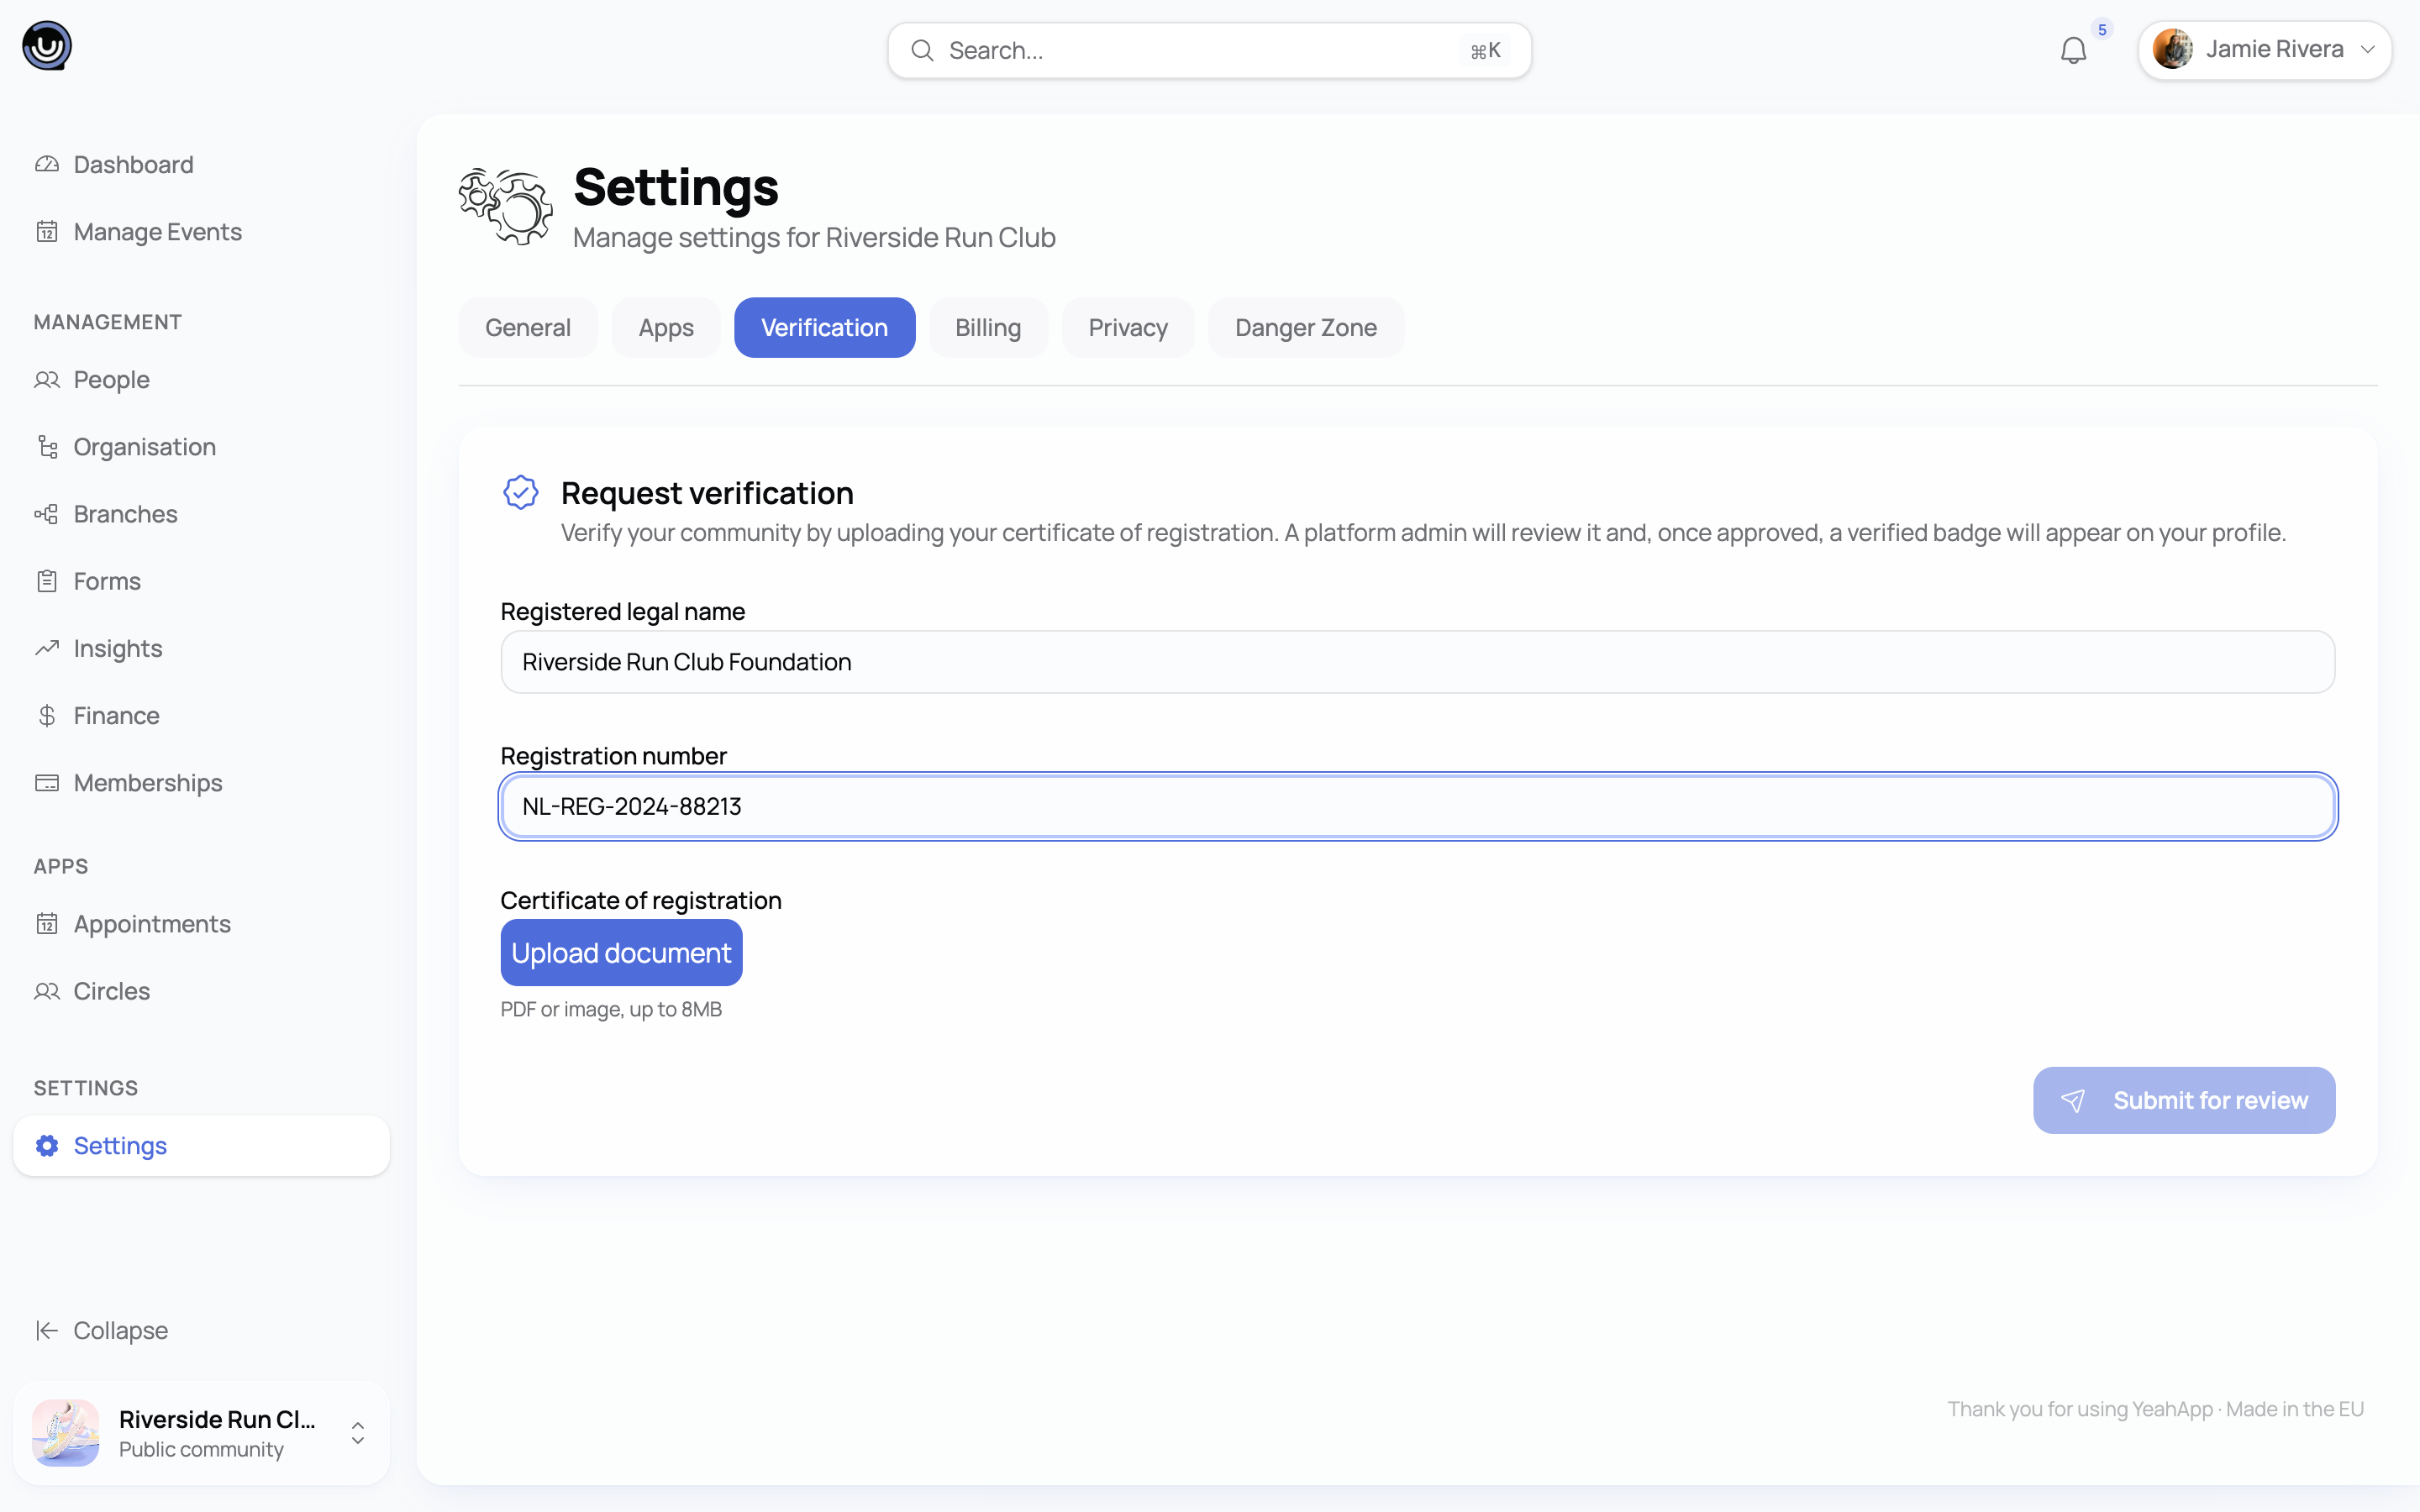
- As the community's owner or an admin, go to Settings → Verification.
- Fill in your legal name and registration number, and upload your certificate of registration.
- Click Submit for review. The tab switches to "Verification under review."
- A platform admin reviews the document. You'll get an in-app notification once they decide.
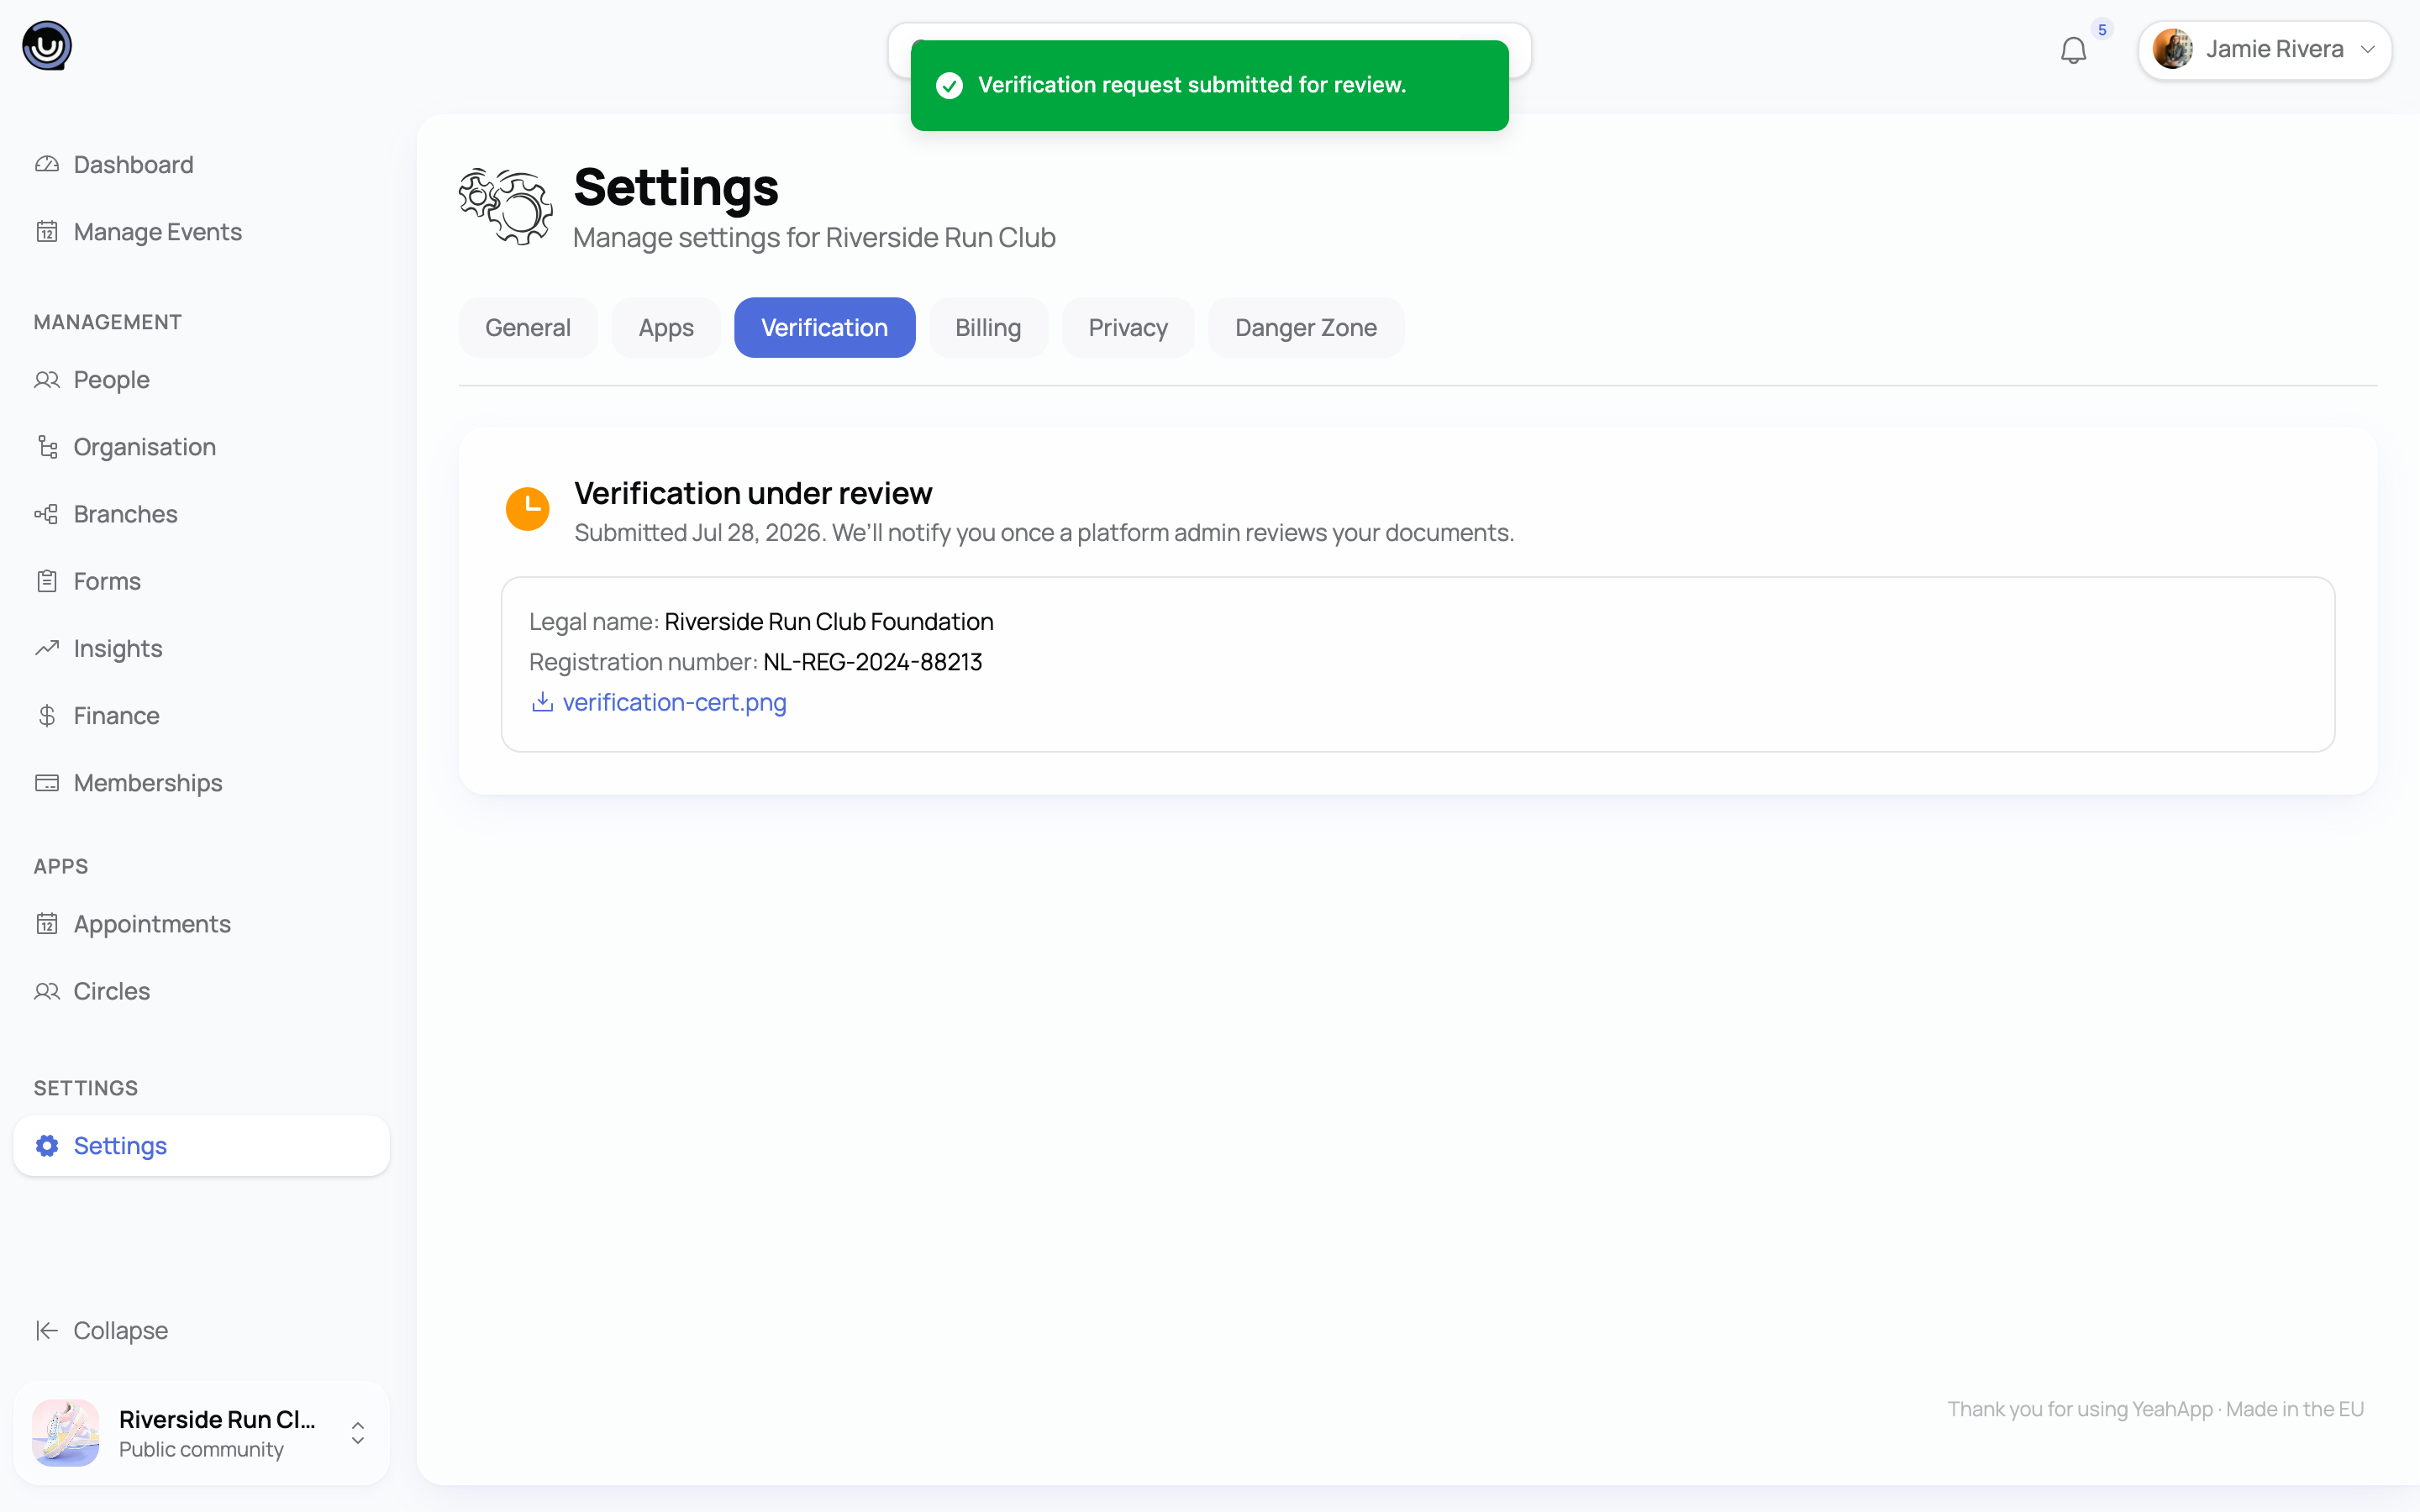
If your community is already verified, this tab just shows that — there's nothing left to do. If a request is already pending, you'll see its status instead of a form.
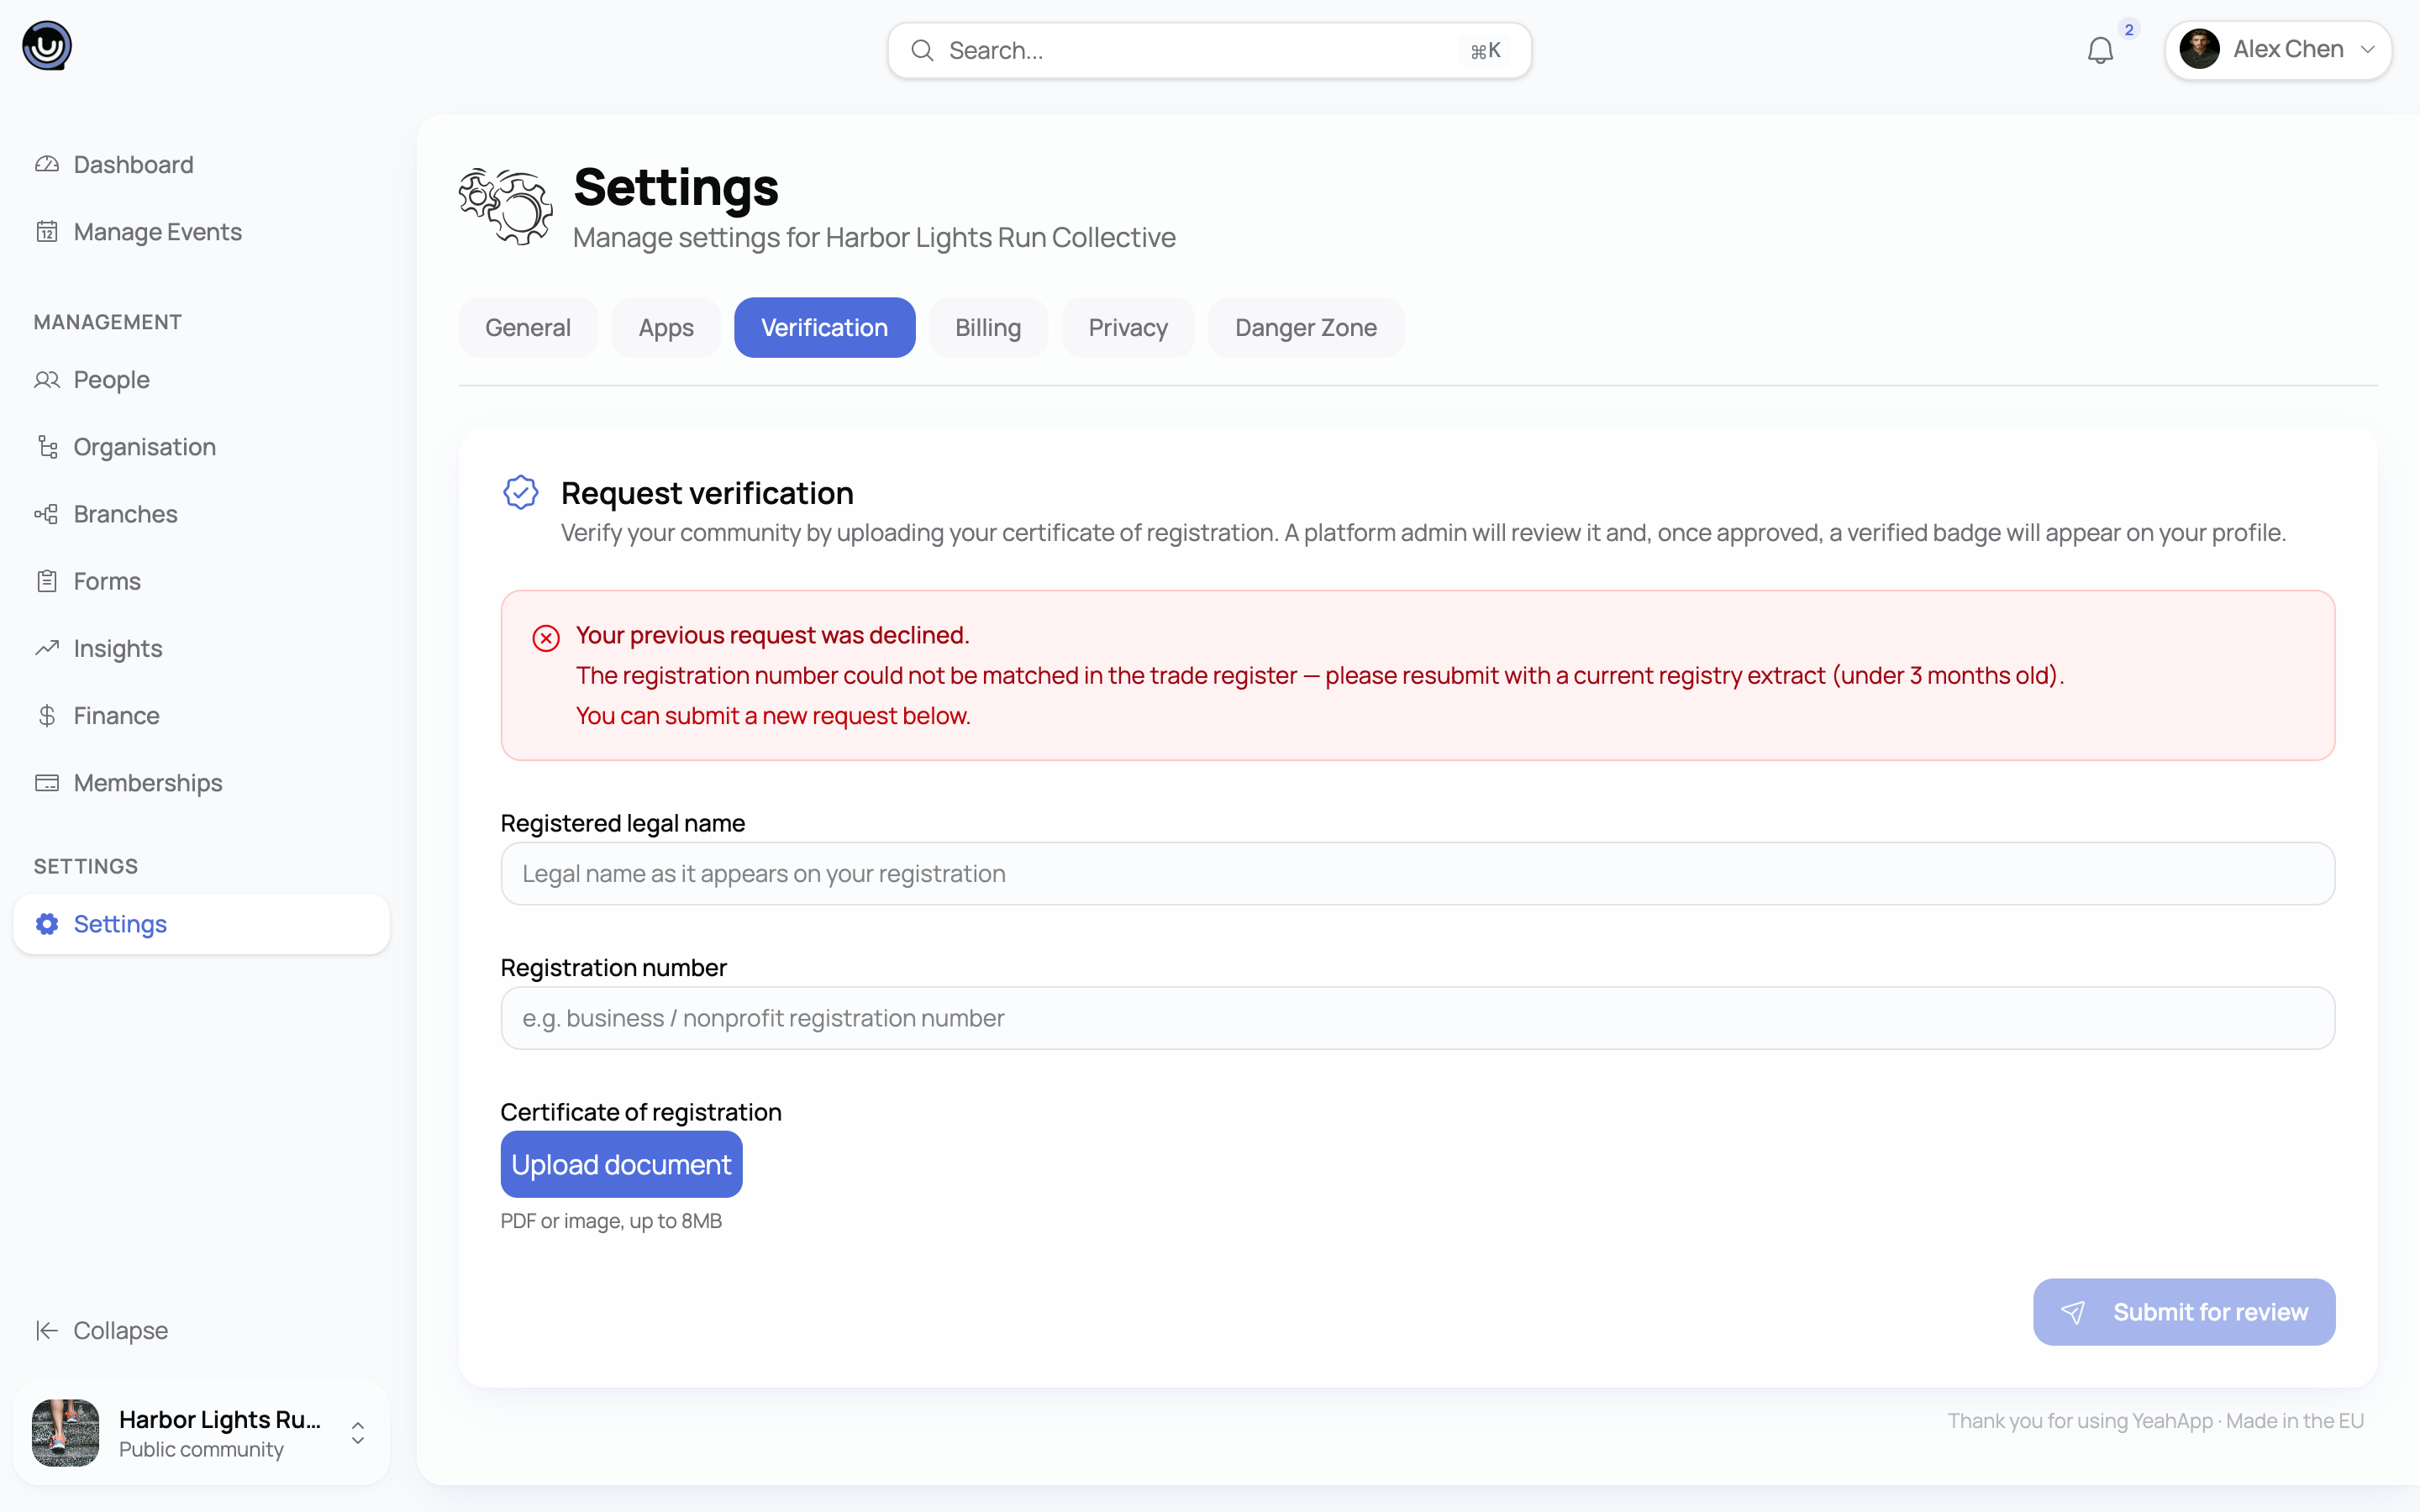
If it's rejected
You'll see the reason the admin gave, and you can submit a fresh request straight away — there's no cooldown. Only your most recent submission is under review; earlier ones stay on record.
If it's later revoked
A platform admin can revoke an already-verified community's badge if something changes (for example, the registration document turns out to be invalid). You'll be notified, and the badge disappears from your community's pages. As with a rejection, you're free to submit a new request afterwards.
Path 2: verify through an organisation account
If you run more than one community, this path saves you from submitting the same paperwork over and over. Verify your account once, and the badge applies automatically to every community you own — including new communities you create afterwards, though not branches you add later (there's a note on that below).
To use this path:
- Your YeahApp account needs to be set up as an organisation account. This is chosen when you first create your account and can't be changed afterwards, so if you signed up as an individual, this path isn't available to you — you'd verify each community individually instead.
- Organisation accounts must sign up with a custom company-domain email address. General consumer email domains (Gmail, Outlook, Yahoo, and similar) aren't accepted for this account type.
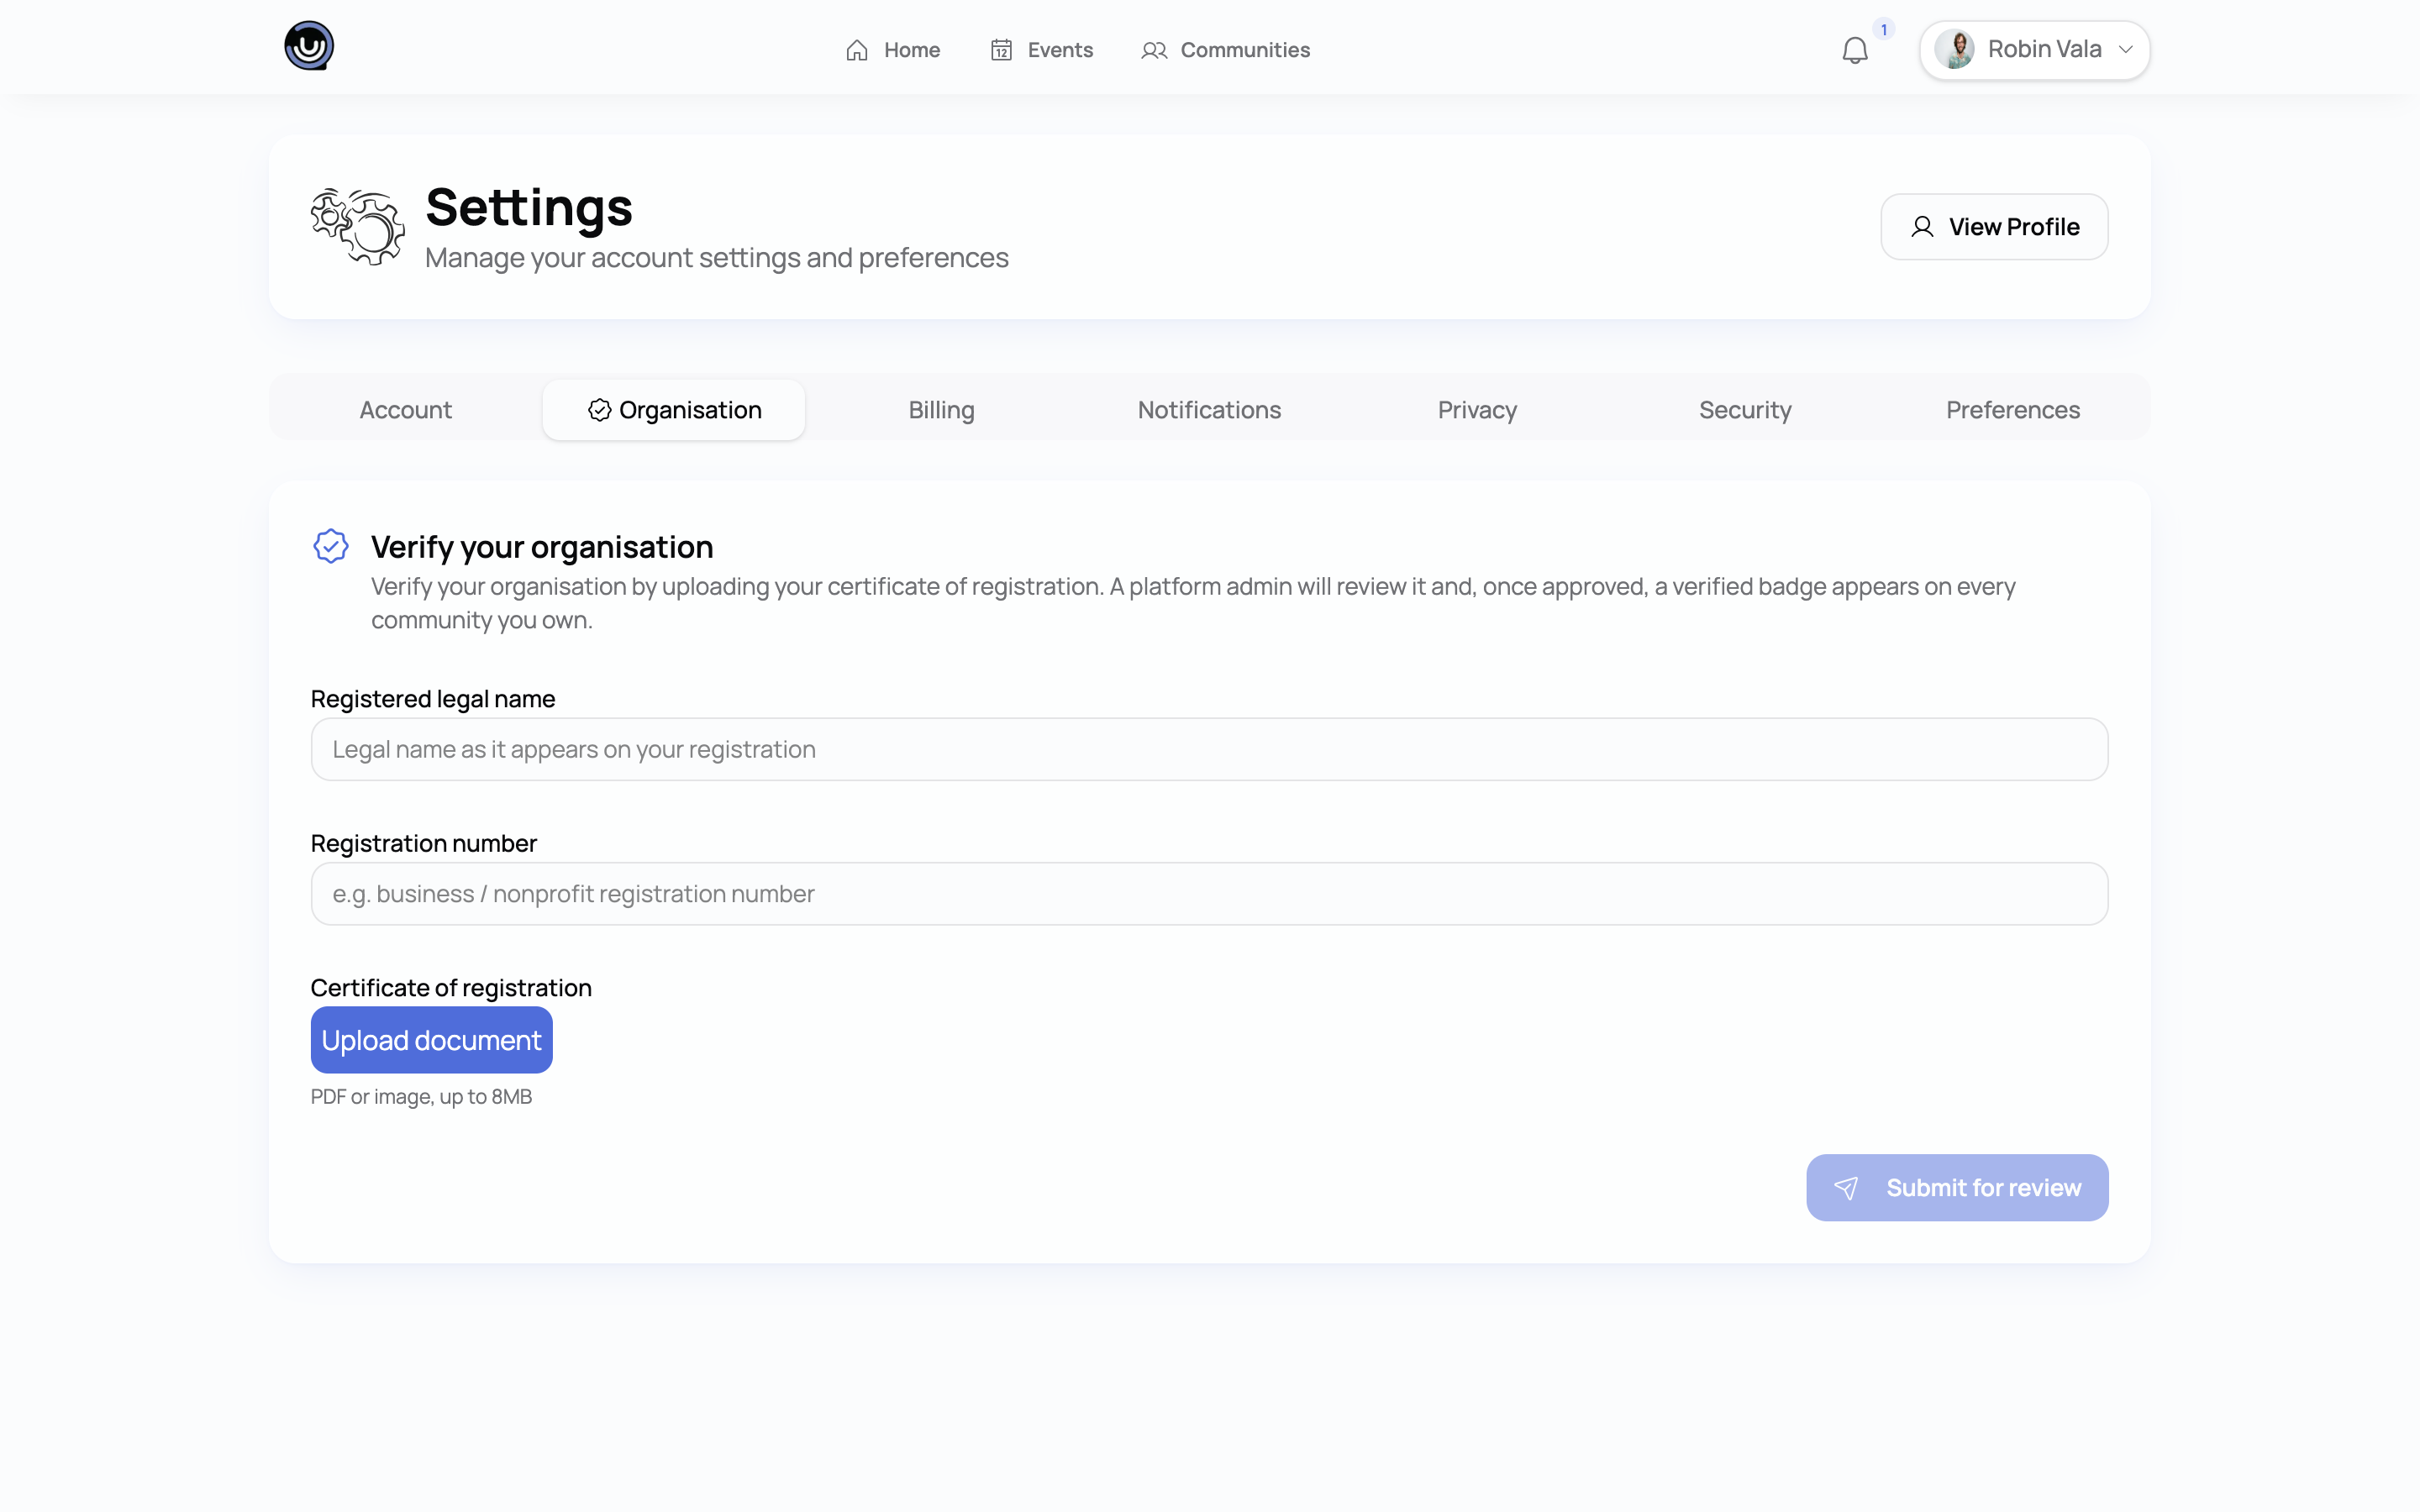
Once your account qualifies, go to Account Settings → Organisation, submit the same three items — legal name, registration number, certificate of registration — and wait for platform-admin review. On approval, every community you currently own gets the badge — branches included — and any new community you create afterwards is verified from the moment it's created.
Heads up. Branches you add after your organisation is approved don't pick up the badge automatically — only full communities do. If you add a branch later and it's missing the tick, contact support.
Heads up. Propagation only fills in the gap — it doesn't overwrite. If one of your communities already verified itself individually before your organisation account was approved, it keeps its own badge and its own record. If your organisation's verification is later revoked, only the communities that got their badge through the organisation lose it; a community that verified itself independently keeps its badge either way.
The full verification flow
This diagram covers both paths end to end — submitting, review, approval or rejection, and what happens if a badge is later revoked.
Who can do this
Submitting a request (either path) requires the Owner or Admin role on the community, or organisation-account access for the account-level path. Moderators and Members don't have access to the Verification tab and can't submit or view request status. See Community Roles & Permissions for the full breakdown of what each role can do.
Where the badge shows up
Once a community is verified, the badge appears wherever that community is shown across YeahApp — its community card, its public profile page, the discover feed, and next to its name on events it hosts or co-hosts. It's the same badge regardless of which path earned it.